C# - Azure REST API 사용을 위한 인증 획득
지난 글에서,
C# - API를 사용해 Azure에 접근하는 방법
; https://www.sysnet.pe.kr/2/0/11480
이미 잘 만들어진 Azure 라이브러리를 이용한 Azure 서비스 제어를 해봤는데요. 마지막에 REST API를 위한 인증 및 사용법을 설명했지만, 아예 그걸 떼어내서 별도의 글로 정리를 합니다. ^^ 물론, 관련해서는 이미 마이크로소프트의 공식 문서에 다음과 같이 잘 설명하고 있습니다.
Authorize access to Azure Active Directory web applications using the OAuth 2.0 code grant flow
; https://docs.microsoft.com/en-us/azure/active-directory/develop/v1-protocols-oauth-code#request-an-authorization-code

OAuth 2.0 코드 권한 부여 흐름을 사용하여 Azure Active Directory 웹 응용 프로그램에 대한 액세스 권한 부여
; https://docs.microsoft.com/ko-kr/azure/active-directory/develop/v1-protocols-oauth-code#request-an-authorization-code
그래도 ^^ 좀 더 간단하게 정리를 해봤으니 참고가 되실 것입니다.
"
Authorize access to Azure Active Directory web applications using the OAuth 2.0 code grant flow" 문서를 보면, 우리가 구해야 할 값은 결국 Azure REST API를 호출할 때마다 함께 전달될 "Authorization: Bearer ...access_token..." 값입니다. 이를 위해 필요한 것은 우선 지난 글에서 설명한,
C# - API를 사용해 Azure에 접근하는 방법
; https://www.sysnet.pe.kr/2/0/11480
IAM 계정입니다. 따라서, Azure CLI를 이용해 다음과 같이,
C:\WINDOWS\system32>az login
Note, we have launched a browser for you to login. For old experience with device code, use "az login --use-device-code"
You have logged in. Now let us find all the subscriptions to which you have access...
[
  {
    "cloudName": "AzureCloud",
    "id": "9757c718-3140-4b9b-b9f9-84ff080353b3",
    "isDefault": true,
    "name": "TestSubs",
    "state": "Enabled",
    "tenantId": "8fcc7edc-6fc9-4b63-ba94-93f2d8584b96",
    "user": {
      "name": "tester@tester.com",
      "type": "user"
    }
  }
]

C:\WINDOWS\system32>az ad sp create-for-rbac --sdk-auth
Retrying role assignment creation: 1/36
Retrying role assignment creation: 2/36
{
  "clientId": "20304878-9518-4506-aea3-a06caae4d55f",
  "clientSecret": "5590caf5-125e-4950-9fe3-9dea908a1059",
  "subscriptionId": "9757c718-3140-4b9b-b9f9-84ff080353b3",
  "tenantId": "8fcc7edc-6fc9-4b63-ba94-93f2d8584b96",
  "activeDirectoryEndpointUrl": "https://login.microsoftonline.com",
  "resourceManagerEndpointUrl": "https://management.azure.com/",
  "activeDirectoryGraphResourceId": "https://graph.windows.net/",
  "sqlManagementEndpointUrl": "https://management.core.windows.net:8443/",
  "galleryEndpointUrl": "https://gallery.azure.com/",
  "managementEndpointUrl": "https://management.core.windows.net/"
}
(위의 'az ad sp ...' 명령어로 생성된 계정은
https://portal.azure.com/#blade/Microsoft_AAD_IAM/ActiveDirectoryMenuBlade/RegisteredApps 경로에서 확인할 수 있습니다.)
"az ad ..." 명령어의 결과로 출력된 인증 정보를 C# 소스 코드에 붙여 넣습니다.
using System.IO;
using System.Threading.Tasks;

namespace ConsoleApp1
{
    class Program
    {
        static async Task Main(string[] args)
        {
            AzureRestClient client = new AzureRestClient();

            string authData = "...[json text]...";
            await client.Login(authData);

            return 0;
        }
    }
}
using Newtonsoft.Json;
using System.Collections.Generic;
using System.Net.Http;
using System.Threading.Tasks;

namespace ConsoleApp1
{
    class AzureRestClient
    {
        HttpClient _client;
        string _subscriptionId;
        string _apiVersion = "2017-12-01";

        public AzureRestClient()
        {
            _client = new HttpClient();
        }

        public async Task<bool> Login(string authData)
        {
            AuthInfo authInfo = JsonConvert.DeserializeObject<AuthInfo>(authData);
            if (authInfo == null)
            {
                return false;
            }
        }
    }
}

public class AuthInfo
{
    public string clientId { get; set; }
    public string clientSecret { get; set; }
    public string subscriptionId { get; set; }
    public string tenantId { get; set; }
    public string activeDirectoryEndpointUrl { get; set; }
    public string resourceManagerEndpointUrl { get; set; }
    public string activeDirectoryGraphResourceId { get; set; }
    public string sqlManagementEndpointUrl { get; set; }
    public string galleryEndpointUrl { get; set; }
    public string managementEndpointUrl { get; set; }
}
그다음, AuthInfo 구조체의 정보를 기반으로 OAuth 인증을 받으면 됩니다. (사실, AuthInfo에서 필요한 필드는 3개에 불과합니다.)
public async Task<bool> Login(string authData)
{
    AuthInfo authInfo = JsonConvert.DeserializeObject<AuthInfo>(authData);
    if (authInfo == null)
    {
        return false;
    }

    string oauth2AzureAD = string.Format("https://login.microsoftonline.com/{0}/oauth2/token", authInfo.tenantId);

    var dict = new Dictionary<string, string>();
    dict.Add("grant_type", "client_credentials");
    dict.Add("client_id", authInfo.clientId);
    dict.Add("client_secret", authInfo.clientSecret);
    dict.Add("resource", authInfo.resourceManagerEndpointUrl);
    var client = new HttpClient();
    var req = new HttpRequestMessage(HttpMethod.Post, oauth2AzureAD) { Content = new FormUrlEncodedContent(dict) };
    HttpResponseMessage hrm = await client.SendAsync(req);

    //...

    return true;
}
정상적으로 인증이 되었다면 다음과 같이 결과를 처리할 수 있습니다.
public async Task<bool> Login(string authData)
{
    //...[생략]...
    HttpResponseMessage hrm = await client.SendAsync(req);

    string result = await hrm.Content.ReadAsStringAsync();

    TokenInfo tokenInfo = JsonConvert.DeserializeObject<TokenInfo>(result);
    string tokenType = tokenInfo.token_type;
    string accessToken = tokenInfo.access_token;

    // ...
}

public class TokenInfo
{
    public string token_type { get; set; }
    public string expires_in { get; set; }
    public string ext_expires_in { get; set; }
    public string expires_on { get; set; }
    public string not_before { get; set; }
    public string resource { get; set; }
    public string access_token { get; set; }
}
바로 저렇게 받아온 tokenType과 accessToken을 기반으로 이후의 모든 호출에서 재사용하도록 HTTP 헤더에 설정해 주면 됩니다.
TokenInfo tokenInfo = JsonConvert.DeserializeObject<TokenInfo>(result);
string tokenType = tokenInfo.token_type;
string accessToken = tokenInfo.access_token;

string authHeader = string.Format("{0} {1}", tokenType, accessToken);
_client.DefaultRequestHeaders.Add("Authorization", authHeader);
_subscriptionId = authInfo.subscriptionId;
예를 들어, 다음의 Azure REST API를 호출해 보겠습니다.
Virtual Machines - List All
; https://docs.microsoft.com/en-us/rest/api/compute/virtualmachines/listall
위의 도움말에서 "Try It" 버튼을 누르면,
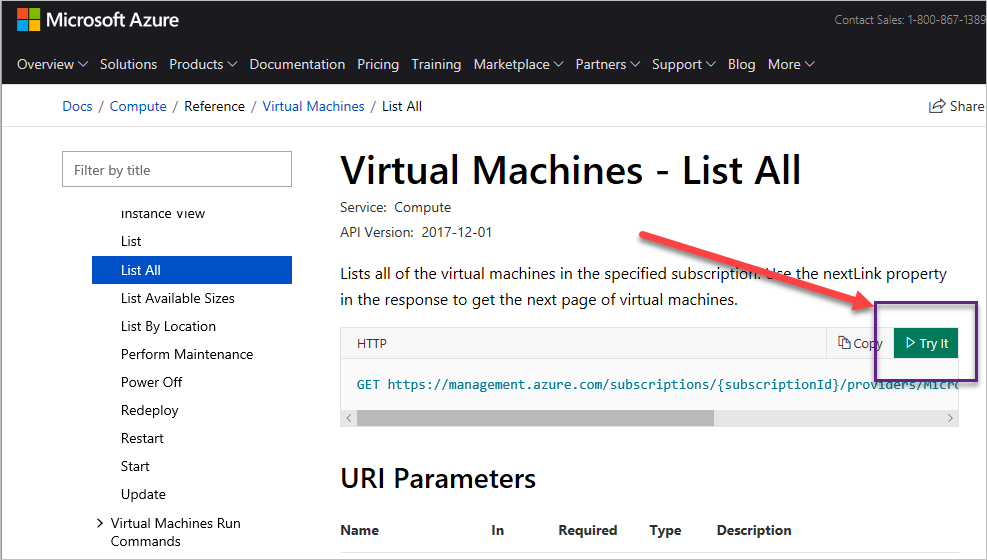
(인증 후) "REST API Try It" 패널로 진입합니다.
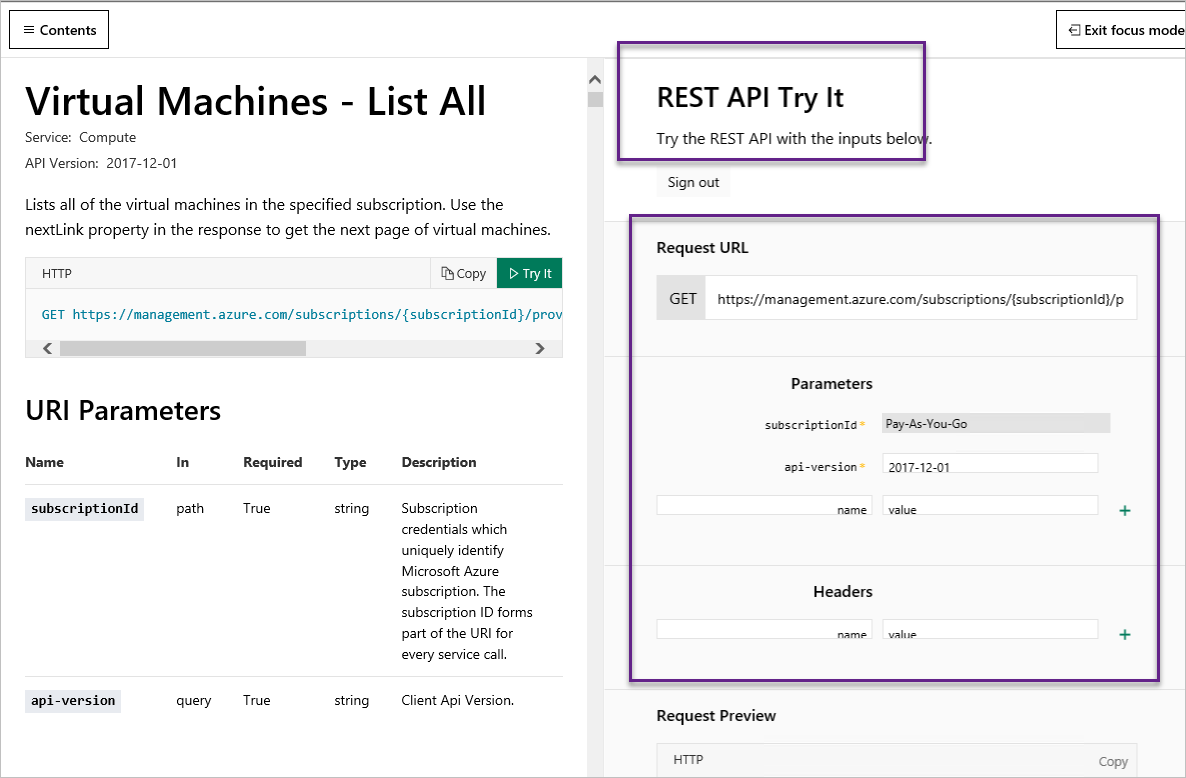
게임 끝이군요. 위의 화면에서 (스크롤하면) 하단 "Run" 버튼을 누르면 Request/Response에 대한 모든 내용을 확인할 수 있습니다. 따라서 위의 정보에 맞게 우리도 호출해 주고 반환된 json 정보를 잘 이용하면 되는 것입니다.
public async Task<VirtualMachineList> GetVMList()
{
    string url = string.Format(
        "https://management.azure.com/subscriptions/{0}/providers/Microsoft.Compute/virtualMachines?api-version={1}", _subscriptionId, _apiVersion);

    HttpResponseMessage hrm = await _client.GetAsync(url);
    string result = await hrm.Content.ReadAsStringAsync();

    VirtualMachineList list = JsonConvert.DeserializeObject<VirtualMachineList>(result);
    return list;
}

static async Task<int> Main(string[] args)
{
    AzureRestClient client = new AzureRestClient();

    string authData = ..."az ad ..." 명령어의 결과...
    if (await client.Login(authData) == true)
    {
        VirtualMachineList machines = await client.GetVMList();
        foreach (var machine in machines.value)
        {
            Console.WriteLine($"{machine.name} at {machine.location}");
        }
    }

    return 0;
}

/*
출력 결과:

vm1 at koreacentral
myvm at koreacentral
*/
(
첨부 파일은 이 글의 예제 코드를 포함합니다.)
참고로 다음의 글들도 읽어 보면 좋습니다.
Azure Active Directory-Authentication OAuth 2.0-Type Password
; https://medium.com/nearsoft-solutions/azure-active-directory-authentication-oauth-2-0-type-password-e119f9a5ad4c

Azure REST APIs with Postman in 2 Minutes
; https://blog.jongallant.com/2017/11/azure-rest-apis-postman/

SubscriptionCloudCredentials Class
; https://docs.microsoft.com/en-us/previous-versions/azure/reference/dn604052(v%3Dazure.100)
첫 번째 링크의 글이 재미있는데요. OAuth 2의 인증 방식이 "Password", "Client credentials", "Implicit", "Authorization Code" 방식이 있다고 하는데, 그에 의하면 제가 설명한 방식은 "Client credentials"에 해당합니다.
dict.Add("grant_type", "client_credentials");
그리고 저 글에서는 "Password" 방식을 이용한 인증을 한다고 설명합니다. 그런데 좀 이해가 안 되는 면이 있다면, Password 방식은 "username"과 "password" 항목을 빼면 "Client credentials"에서 전달해야 할 값과 동일합니다. 그렇다는 것은 굳이 위험하게 더 많은 정보를 구할 필요 없이 그냥 "client_credentials" 방식으로 해도 될 것 같은데, 왜??? "Password" 방식이 있느냐 하는 것입니다. 혹시 아시는 분은 덧글 부탁드립니다. ^^
[이 글에 대해서 여러분들과 의견을 공유하고 싶습니다. 틀리거나 미흡한 부분 또는 의문 사항이 있으시면 언제든 댓글 남겨주십시오.]