basicHttpBinding + 사용자 정의 인증 구현
예전에도 WCF의 사용자 정의 인증 구현 예제를 소개해 드렸는데요.
WCF 사용자 정의 인증 구현 예제
; https://www.sysnet.pe.kr/2/0/864
위의 예제는 다음과 같은 특징들이 있습니다.
- netTcpBinding
- 독립실행형 EXE에서 WCF 서버 호스팅
- <security mode="Message" /> 사용
- 사용자 정의 인증 사용
하지만, 이번에는 다음과 같은 특징을 가진 WCF 예제를 소개해드릴려고 합니다.
- basicHttpBinding
- IIS / HTTPS 사용
- <security mode="TransportWithMessageCredential" /> 사용
- 사용자 정의 인증 사용
단적으로 말해서, 이번 글은 제가 기존에 써 두었던 "
WCF 사용자 정의 인증 구현 예제"에서 다음의 글에 나오는 요소를 더하면 됩니다.
Username Authentication over basicHttpBinding with WCF’s ChannelFactory Interface
; http://nirajrules.wordpress.com/2009/05/22/username-over-https-custombinding-with-wcf%E2%80%99s-channelfactory-interface/
처음부터 예제를 만들기보다는, 지난번 글에 실린 예제 코드에서 살을 붙이는 식으로 진행해 볼 텐데 이를 위해 우선 다음의 예제 코드를 다운로드합니다.
WcfUserName.zip
; https://www.sysnet.pe.kr/bbs/DownloadAttachment.aspx?fid=529&boardid=331301885
솔루션 파일을 Visual Studio IDE에서 로드한 후 웹 애플리케이션을 하나 생성하고 기존의 UserNamePasswordAuth 프로젝트를 참조 추가 및 예제용으로 TestService.svc 서비스를 하나 생성합니다.
다음으로 TestService.svc에 대한 사용자 정의 인증 구현 설정을 web.config에 다음과 같이 추가해 줍니다.
<system.serviceModel>

  <services>
    <service name="WebApplication1.TestService" behaviorConfiguration="TestServiceBehavior">
      <endpoint address="" binding="basicHttpBinding"
              bindingConfiguration="basicHttpBindingConfiguration"
              contract="WebApplication1.ITestService" />
    </service>
  </services>

  <bindings>
    <basicHttpBinding>
      <binding name="basicHttpBindingConfiguration">
        <security mode="TransportWithMessageCredential">
          <message clientCredentialType="UserName"/>
        </security>
      </binding>
    </basicHttpBinding>
  </bindings>

  <behaviors>

    <serviceBehaviors>

      <behavior name="TestServiceBehavior">
        <serviceCredentials>
          <userNameAuthentication userNamePasswordValidationMode="Custom"
                                  customUserNamePasswordValidatorType="UserNamePasswordAuth.DatabaseBasedValidator, UserNamePasswordAuth"/>
        </serviceCredentials>

        <serviceMetadata httpGetEnabled="true" />
        <serviceDebug includeExceptionDetailInFaults="false" />
      </behavior>

    </serviceBehaviors>

  </behaviors>
  <serviceHostingEnvironment multipleSiteBindingsEnabled="true" />
</system.serviceModel>
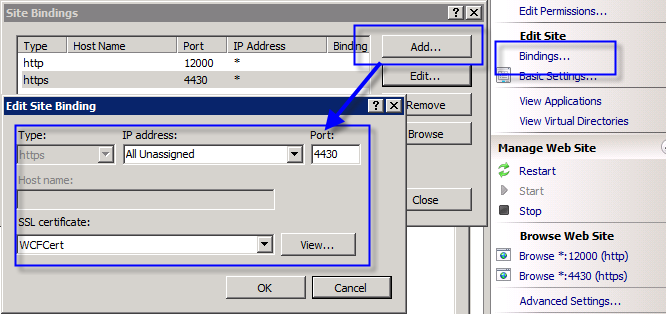
일단, 서버 측은 이것으로 완료되었습니다. IIS 서버에 배포하고 HTTPS 바인딩 설정과 자가 서명한 "SSL 인증서"도 할당해 줍니다.
자, 이제 클라이언트 측 호출 코드인데요. 우선, 우리가 임의로 발급한 인증서이기 때문에 이에 대한 유효성 검사를 무시할 수 있도록 다음과 같은 코드를 넣어둡니다.
System.Net.ServicePointManager.ServerCertificateValidationCallback =
    ((sender, certificate, chain, sslPolicyErrors) => true);
"
WCF 사용자 정의 인증 구현 예제"에서는 serviceCertificate를 자체적으로 지정하고 있었고 클라이언트 측에서는 역시 인증서에 대한 유효성 검사를 <authentication certificateValidationMode="None" /> 설정으로 무시를 했었는데요. HTTPS에 사용된 인증서의 유효성 검사에 대해서는 위와 같이 ServerCertificateValidationCallback을 재지정함으로써 가능합니다.
이후 코드는 예전의 것과 다르지 않습니다.
using (ChannelFactory<WebApplication1.ITestService> factory =
    new ChannelFactory<WebApplication1.ITestService>("BasicHttpBinding_ITestService"))
{
    factory.Credentials.UserName.UserName = "test";
    factory.Credentials.UserName.Password = "test";

    WebApplication1.ITestService svc = factory.CreateChannel();
    ICommunicationObject cn = svc as ICommunicationObject;

    try
    {
        svc.DoWork();
        cn.Close();
    }
    catch (Exception ex)
    {
        Console.WriteLine(ex.ToString());
        cn.Abort();
    }
}
단지, "BasicHttpBinding_ITestService"로 지정한 app.config의 바인딩 설정만을 맞춰주면 되는데, 다음과 같이 security 노드의 일부 값과 address 값의 https 프로토콜을 사용하도록 변경합니다.
<system.serviceModel>
  <client>
    <endpoint address="https://...:4430/TestService.svc"
              binding="basicHttpBinding"
              bindingConfiguration="BasicHttpBinding_ITestService"
              contract="WebApplication1.ITestService"
              name="BasicHttpBinding_ITestService"/>
  </client>

  <bindings>
    <basicHttpBinding>
      <binding name="BasicHttpBinding_ITestService">
        <security mode="TransportWithMessageCredential">
          <message clientCredentialType="UserName"/>
        </security>
      </binding>
    </basicHttpBinding>

  </bindings>

</system.serviceModel>
이제, 실행하면 정상적으로 "test" / "test" 계정으로 인증되는 것을 확인할 수 있습니다.
첨부한 파일은 위의 내용을 포함하고 있습니다.
그런데, 원래 제가 이번 실습을 하려는 의도는 따로 있었습니다. 바로 아래의 글이 모델이었는데요.
Finally! Usernames over Transport Authentication in WCF
; https://leastprivilege.com/2007/10/31/finally-usernames-over-transport-authentication-in-wcf/
위의 글에서 다음과 같은 문구가 나오는데요.
You may say now - isn't that exactly what TransportWithMessageCredential is supposed to do? Not exactly - because this involves sending a basic WS-Security SOAP header inside of the message. I want simple HTTP basic auth....
언급된 것처럼, 다른 플랫폼과의 보다 자유로운 Interop이 이뤄지려면 SecurityMode == TransportWithMessageCredential 상태는 바람직하지 않습니다. 그래서 위의 글에서 설명한 대로 예제를 진행했었는데, (아울러, IIS 서버 측의 "Basic Authentication"을 활성화 시켜야 합니다.)
<bindings>
  <basicHttpBinding>
    <binding name="secureBasic">
      <security mode="Transport">
        <transport clientCredentialType="Basic" />
      </security>
    </binding>
  </basicHttpBinding>
</bindings>
아쉽게도, 제 경우에는 customUserNamePasswordValidatorType에 지정된 사용자 정의 인증 모듈이 불려지지 않아서 다음과 같은 오류만 발생했습니다.
System.ServiceModel.Security.MessageSecurityException: The HTTP request is unauthorized with client authentication scheme 'Basic'. The authentication header received from the server was 'Basic realm="..."'. ---> System.Net.WebException: The remote server returned an error: (401) Unauthorized.
대신에, 지정된 대로 순수하게 Windows에 등록된 계정 정보를 Basic 인증에 넣어서 보내야만 정상적으로 인증이 되었습니다.
혹시, basicHttpBinding + security mode="Transport" + clientCredentialType="Basic"의 설정으로 사용자 정의 인증 모듈 호출에 성공하신 분이 있다면 소개 부탁드리겠습니다. ^^
[이 글에 대해서 여러분들과 의견을 공유하고 싶습니다. 틀리거나 미흡한 부분 또는 의문 사항이 있으시면 언제든 댓글 남겨주십시오.]