.NET으로 구현하는 OpenGL (6) - Texturing
아래의 글에 이어,
.NET으로 구현하는 OpenGL (4), (5) - Shader
; https://www.sysnet.pe.kr/2/0/11774
6회 강좌는,
OpenGL 3D Game Tutorial 6: Texturing
; https://youtu.be/SPt-aogu72A
3D 객체에 texture를 입히는 방법에 대해 설명하고 있습니다. OpenGL에서 texture는 이미지의 색상 데이터를 구하는 것에서 시작하는데, 아쉽게도 OpenGL 자체는 이미지 파일들에 대한 로드 방법을 제공하지 않습니다. 즉, 그 부분은 우리가 직접 구현해야 하는 것입니다. 가령, 그나마 가장 간단한 유형인 BMP 파일의 경우 아래의 글에 설명하는 데로,
Tutorial 5 : A Textured Cube
; http://www.opengl-tutorial.org/kr/beginners-tutorials/tutorial-5-a-textured-cube/
직접 이미지의 데이터를 로드해서 glGenTextures, glBindTexture, glTexImage2D 등의 함수를 이용해 사용할 수 있습니다. 그런데, 사실 저건 C/C++의 상황에서 그런 것이고 닷넷이라면 Bitmap 타입이 알아서 대표적인 이미지들에 대한 데이터 처리를 해주므로,
OpenGL C# (OpenTK) Load and Draw Image functions not working
; https://stackoverflow.com/questions/11645368/opengl-c-sharp-opentk-load-and-draw-image-functions-not-working
그나마 간단하게 OpenGL 리소스로 바인딩할 수 있습니다. 혹은, 다양한 이미지 파일을 OpenGL 용으로 바인딩해주는 라이브러리를 가져다 쓰는 것도 가능합니다. soil이 그런 용도로 사용할 수 있는 오픈 소스인데요,
soil 1.16.0 - Simple OpenGL Image Library
; https://www.nuget.org/packages/soil/
; http://www.lonesock.net/soil.html
NuGet에서도 제공하긴 하지만 아쉽게도 해당 라이브러리는 C/C++ 용으로 닷넷에서는 사용할 수 없습니다. 대신... ^^ 제가 저 라이브러리를 .NET 용으로 래핑했으므로,
SOIL(Simple OpenGL Image Library) - Native DLL 및 .NET DLL 제공
; https://www.sysnet.pe.kr/2/0/11768
; https://www.nuget.org/packages/SoilDotnet
저걸 가져다 쓰시면 됩니다.
Install-Package SoilDotnet
자, 그럼 지난 5회 강좌의 소스 코드에 texture를 입히는 과정을 진행해 보겠습니다.
우선, 3D 객체의 정보를 담고 있는 Model에 texture 매핑 정보를 담을 UV 좌표 데이터를 연결해야 합니다.
// MainForm.cs

float[] _textureCoords =
{
    0,0, // V0
    0,1, // V1
    1,1, // V2
    1,0, // V3
};

private void glControl_ContextCreated(object sender, OpenGL.GlControlEventArgs e)
{
    GlControl glControl = (GlControl)sender;
    _displayManager.createDisplay(glControl);

    // ...[생략]...

    // 3D 객체에 _textureCoords UV 좌표 데이터를 추가
    _model = _loader.loadToVAO(_vertices, _textureCoords, _indices);

    // ...[생략]...
}
loadToVAO에서는 당연히 _textureCoords 데이터를 GPU 메모리에 올리고, VAO의 슬롯 하나에 UV 데이터를 바인딩합니다.
// Loader.cs

public RawModel loadToVAO(float [] positions, float [] textures, int[] indices)
{
    uint vaoID = createVAO();

    bindIndicesBuffer(indices);
    storeDataInAttributeList(0, 3, positions); // Position 데이터를 VAO의 0번 슬롯에 할당
    storeDataInAttributeList(1, 2, textures);  // textures UV 매핑 데이터를 VAO의 1번 슬롯에 할당
    unbindVAO();

    return new RawModel(vaoID, positions.Length);
}

unsafe void storeDataInAttributeList(uint attributeNumber, int coordinateSize, float[] data)
{
    uint vboID = Gl.GenBuffer();
    _vbos.Add(vboID);

    Gl.BindBuffer(BufferTarget.ArrayBuffer, vboID);
    Gl.BufferData(BufferTarget.ArrayBuffer, (uint)(data.Length * sizeof(float)), data, BufferUsage.StaticDraw);

    Gl.VertexAttribPointer(attributeNumber, coordinateSize, VertexAttribType.Float, false, 0, IntPtr.Zero);

    Gl.BindBuffer(BufferTarget.ArrayBuffer, 0);
}
texture UV 매핑 데이터를 Model에 넣었으니 이제 해당 texture를 로드해야 합니다. 이를 위해 Texture 처리를 Loader 타입에 제공하고,
// Loader.cs

List _textures = new List();

public void CleanUp()
{
    Gl.DeleteVertexArrays(_vaos.ToArray());
    Gl.DeleteBuffers(_vbos.ToArray());
    Gl.DeleteTextures(_textures.ToArray());
}

public uint loadTexture(string fileName)
{
    string filePath = $".\\res\\{fileName}.png";

    uint tex2d_id = Soil.NET.WrapSOIL.load_OGL_texture(filePath, Soil.NET.WrapSOIL.SOIL_LOAD.AUTO, Soil.NET.WrapSOIL.SOIL_NEW.ID,
        Soil.NET.WrapSOIL.SOIL_FLAG.MIPMAPS | Soil.NET.WrapSOIL.SOIL_FLAG.NTSC_SAFE_RGB | Soil.NET.WrapSOIL.SOIL_FLAG.COMPRESS_TO_DXT);

    _textures.Add(tex2d_id);
    return tex2d_id;
}
Model에 입힐 Texture 자원의 바인딩 핸들을 보관할 ModelTexture 타입과,
// ModelTexture.cs

namespace GameApp
{
    public class ModelTexture
    {
        uint _textureID;
        public uint ID
        {
            get { return _textureID; }
        }

        public ModelTexture(uint id)
        {
            this._textureID = id;
        }
    }
}
Texture가 지정된 Model을 나타내는 TextureModel 타입을 만듭니다. (작명이 다소 혼란스럽지만
원 강좌의 내용을 그대로 따라 했습니다.)
// TextureModel.cs

namespace GameApp.Model
{
    public class TextureModel
    {
        RawModel _rawModel;
        public RawModel RawModel
        {
            get { return _rawModel; }
        }

        ModelTexture _texture;
        public ModelTexture Texture
        {
            get { return _texture; }
        }

        public TextureModel(RawModel model, ModelTexture texture)
        {
            this._rawModel = model;
            this._texture = texture;
        }
    }
}
이제 이것들을 통합해서 초기화하면 데이터는 모두 마련이 됩니다.
// MainForm.cs

ModelTexture _texture;
TextureModel _textureModel;

private void glControl_ContextCreated(object sender, OpenGL.GlControlEventArgs e)
{
    GlControl glControl = (GlControl)sender;
    _displayManager.createDisplay(glControl);

    // SOIL.NET 초기화
    bool result = Soil.NET.WrapSOIL.Initialize();
    if (result == false)
    {
        MessageBox.Show("SOIL: Not initialized: " + Soil.NET.WrapSOIL.GetSoilLastError());
        return;
    }

    _loader = new Loader();
    _renderer = new Renderer();
    _model = _loader.loadToVAO(_vertices, _textureCoords, _indices);
    _texture = new ModelTexture(_loader.loadTexture("image"));
    _textureModel = new TextureModel(_model, _texture);
    _shader = new StaticShader();
}
(잊지 말고 /res 폴더에 256x256 크기의 image.png 파일을 넣어둡니다.)
나머지는 이제 렌더링과 관련된 변경을 해야 합니다. Texture가 지정된 Model이 되었으므로 이제 Renderer 타입에서는 _textureModel을 렌더링할 수 있어야 합니다.
// MainForm.cs

private void glControl_Render(object sender, OpenGL.GlControlEventArgs e)
{
    Control senderControl = (Control)sender;
    Gl.Viewport(0, 0, senderControl.ClientSize.Width, senderControl.ClientSize.Height);

    _renderer.Prepare();
    _shader.Start();
    _renderer.Render(_textureModel);
    _shader.Stop();

    _displayManager.updateDisplay();
}
따라서 Renderer의 Redner 메서드도 다음과 같이 바뀌게 됩니다.
public void Render(TextureModel textureModel)
{
    RawModel model = textureModel.RawModel;
    Gl.BindVertexArray(model.VaoID);
    Gl.EnableVertexAttribArray(0);
    Gl.EnableVertexAttribArray(1); // UV 매핑 데이터 Slot 활성

    Gl.ActiveTexture(TextureUnit.Texture0);
    Gl.BindTexture(TextureTarget.Texture2d, textureModel.Texture.ID);
    Gl.DrawElements(PrimitiveType.Triangles, model.VertexCount, DrawElementsType.UnsignedInt, IntPtr.Zero);

    Gl.DisableVertexAttribArray(0);
    Gl.DisableVertexAttribArray(1); // UV 매핑 데이터 Slot 비활성
    Gl.BindVertexArray(0);
}
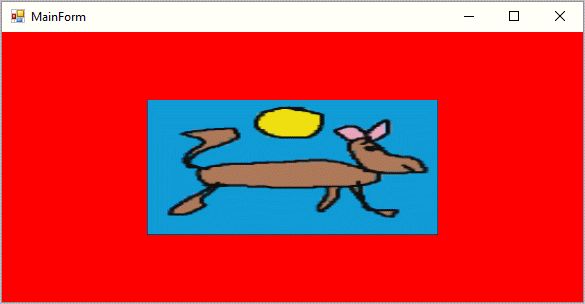
끝입니다. 이렇게 변경하고 실행하면 다음과 같은 화면을 볼 수 있습니다.
(
첨부 파일은 이 글의 예제 프로젝트를 포함합니다.)
참고로 이번에도 역시, bindAttribute의 코드는 없애도 실행에는 아무런 지장이 없습니다.
// StaticShader.cs

public class StaticShader : ShaderProgram
{
    const string VERTEX_FILE = "./shaders/vertexShader.txt";
    const string FRAGMENT_FILE = "./shaders/fragmentShader.txt";

    public StaticShader() : base(VERTEX_FILE, FRAGMENT_FILE)
    {
    }

    protected override void bindAttributes()
    {
        // base.bindAttribute(0, "_position");
        // base.bindAttribute(1, "_textureCoords");
    }
}
[이 글에 대해서 여러분들과 의견을 공유하고 싶습니다. 틀리거나 미흡한 부분 또는 의문 사항이 있으시면 언제든 댓글 남겨주십시오.]