Windows 환경에서의 Hello World x64 어셈블리 예제 (MASM 버전)
리눅스를 알아봤으니,
리눅스/WSL - hello world 어셈블리 코드 x86/x64 (nasm)
; https://www.sysnet.pe.kr/2/0/13181
당연히 Windows 환경도 다뤄봐야지요. ^^ 이에 대해서는 각종 Q&A에 잘 나와 있습니다.
How to write hello world in assembly under Windows?
; https://stackoverflow.com/questions/1023593/how-to-write-hello-world-in-assembly-under-windows
직접 실습해 볼까요? ^^
우선 컴파일러가 필요한데, Visual Studio를 설치했다면 다음의 경로에
ml64.exe (Macro Assembler for x64) 컴파일러가 있을 것입니다.
// 버전마다 다를 수 있고,
// 만약 없다면, "C++을 사용한 데스크톱 개발(Desktop development with C++)" 구성 요소를 추가로 설치합니다.

C:\Program Files\Microsoft Visual Studio\2022\Enterprise\VC\Tools\MSVC\14.34.31933\bin\Hostx64\x64\ml64.exe
혹은 (Visual Studio Community 버전도 무료지만) 무료 다운로드로 "Build Tools for Visual Studio"를 설치하면,
Build Tools for Visual Studio 2022
; https://visualstudio.microsoft.com/downloads/#build-tools-for-visual-studio-2022
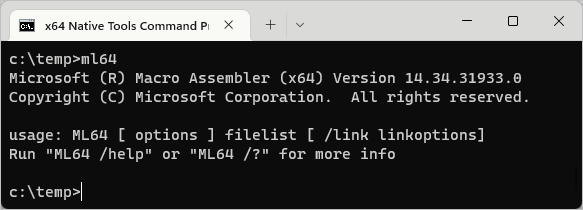
Macro Assembler를 구할 수 있습니다. MASM으로 개발하는 경우 빌드를 쉽게 하기 위해 Visual Studio 설치 시 함께 추가되는 "x64 Native Tools Command Prompt for VS 2022" 명령행 창을 이용하면 곧바로 ml64.exe를 실행할 수 있습니다.

그럼 코딩을 해볼까요? ^^
아쉽게도 Windows의 경우 (리눅스와는 달리) Win32 API로 시스템 콜을 감싸기 때문에 약간 불편한 Hello World 예제가 나옵니다. "
How to write hello world in assembly under Windows?" 글의 답변에 있는 첫 번째 예제가 바로 3개의 Win32 API를 이용해,
HANDLE WINAPI GetStdHandle(_In_ DWORD nStdHandle);
; https://learn.microsoft.com/en-us/windows/console/getstdhandle

BOOL WriteFile([in] HANDLE hFile, [in] LPCVOID lpBuffer, [in] DWORD nNumberOfBytesToWrite, [out, optional] LPDWORD lpNumberOfBytesWritten, [in, out, optional] LPOVERLAPPED lpOverlapped);
; https://learn.microsoft.com/en-us/windows/win32/api/fileapi/nf-fileapi-writefile

void ExitProcess([in] UINT uExitCode);
; https://learn.microsoft.com/en-us/windows/win32/api/processthreadsapi/nf-processthreadsapi-exitprocess
만든 Hello World Win32 콘솔 응용 프로그램입니다.
; hello.asm

extern ExitProcess : near
extern WriteFile : near
extern GetStdHandle : near

    .data
message db 'Hello World!', 0
message_len dq 12

    .code

main proc
    sub  rsp, 28h

    mov     rcx, -11
    call    GetStdHandle

    mov     rcx, rax
    lea     rdx, [message]
    mov     r8, message_len
    mov     r9, 0
    push    0
    call    WriteFile

    mov     rcx, rax
    call    ExitProcess

main endp

end
빌드하면 2,560 바이트의 작은 exe 파일이 생성되고 실제로 실행까지 잘 됩니다.
// 또는 이렇게 빌드해도 되고,
// ml64 hello.asm /link /nodefaultlib kernel32.lib user32.lib /entry:main

c:\temp> ml64 hello.asm /link kernel32.lib user32.lib /entry:main
Microsoft (R) Macro Assembler (x64) Version 14.34.31933.0
Copyright (C) Microsoft Corporation.  All rights reserved.

 Assembling: hello.asm
Microsoft (R) Incremental Linker Version 14.34.31933.0
Copyright (C) Microsoft Corporation.  All rights reserved.

/OUT:hello.exe
hello.obj
kernel32.lib
user32.lib
/entry:main

c:\temp> hello
Hello World!
혹은 MessageBox를 이용한,
int MessageBox([in, optional] HWND hWnd, [in, optional] LPCTSTR lpText, [in, optional] LPCTSTR lpCaption, [in] UINT uType);
; https://learn.microsoft.com/en-us/windows/win32/api/winuser/nf-winuser-messagebox
GUI스러운 Hello World라면 좀 더 간단하게 코드가 나옵니다.
; hello_msgbox.asm

extern ExitProcess : near
extern MessageBoxA : near

    .data
msgtitle db 'x64 App', 0
message db 'Hello World!', 0

    .code

main proc
    sub  rsp, 28h

    mov     rcx, 0
    lea     rdx, [message]
    lea     r8, [msgtitle]
    mov     r9, 0
    call    MessageBoxA

    mov     rcx, rax
    call    ExitProcess

main endp

end
// ml64 hello_msgbox.asm /link /nodefaultlib kernel32.lib user32.lib /entry:main

c:\temp> ml64 hello_msgbox.asm /link kernel32.lib user32.lib /entry:main
Microsoft (R) Macro Assembler (x64) Version 14.34.31933.0
Copyright (C) Microsoft Corporation.  All rights reserved.

 Assembling: hello_msgbox.asm
Microsoft (R) Incremental Linker Version 14.34.31933.0
Copyright (C) Microsoft Corporation.  All rights reserved.

/OUT:hello_msgbox.exe
hello_msgbox.obj
kernel32.lib
user32.lib
/entry:main

c:\temp> hello_msgbox
// Win32 MesageBox 창 출력
참고로, 이전 콘솔 출력과는 달리 위의 응용 프로그램은 GUI만을 사용하므로 ml64의 명령행에 /subsystem을 추가해도 됩니다.
ml64 hello_msgbox.asm /link /subsystem:windows kernel32.lib user32.lib /entry:main
만약, GUI가 아닌 명령행이라면 (예를 들어, 이전 hello.asm과 같은 경우) /subsystem 옵션을 제거하거나, "/subsystem:console" 옵션을 줘야 합니다.
마지막으로, C++ 런타임과 연동하는 것도 볼까요? ^^
; hello_cpp.asm

extern ExitProcess : near
extern printf : near

    .data
message db 'Hello World!', 0

    .code

main proc
    sub  rsp, 28h

    lea     rcx, [message]
    call    printf

    mov     rcx, rax
    call    ExitProcess

main endp

end
빌드는 관련 CRT 라이브러리의 추가로 mainCRTStartup을 추가해야 하는 정도의 배려만 하면 됩니다.
// 아래와 같이 빌드해도 되고,
// ml64 hello_cpp.asm /link /nodefaultlib /subsystem:console ucrt.lib libcmt.lib vcruntime.lib legacy_stdio_definitions.lib legacy_stdio_wide_specifiers.lib kernel32.lib /entry:mainCRTStartup

c:\temp> ml64 hello_cpp.asm /link /subsystem:console libcmt.lib /entry:mainCRTStartup

Microsoft (R) Macro Assembler (x64) Version 14.34.31933.0
Copyright (C) Microsoft Corporation.  All rights reserved.

 Assembling: hello_cpp.asm
Microsoft (R) Incremental Linker Version 14.34.31933.0
Copyright (C) Microsoft Corporation.  All rights reserved.

/OUT:hello_cpp.exe
hello_cpp.obj
/subsystem:console
libcmt.lib
/entry:mainCRTStartup

c:\temp> hello_cpp
Hello World!
참고로, Visual Studio의 경우 Visual C++와 연동하는 용도로 Assembly 코드를 사용하고 싶다면 다음의 글을 보시면 됩니다. ^^
Visual C++ / x64 환경에서 inline-assembly를 매크로 어셈블리로 대체하는 방법 - 두 번째 이야기
; https://www.sysnet.pe.kr/2/0/11691
[이 글에 대해서 여러분들과 의견을 공유하고 싶습니다. 틀리거나 미흡한 부분 또는 의문 사항이 있으시면 언제든 댓글 남겨주십시오.]