Microsoft MVP성태의 닷넷 이야기
개발 환경 구성: 672. DosBox를 이용한 Turbo C, Windows 3.1 설치 [링크 복사], [링크+제목 복사],
조회: 13915
글쓴 사람
정성태 (techsharer at outlook.com)
홈페이지
첨부 파일
 

DosBox를 이용한 Turbo C, Windows 3.1 설치

DosBox를 다운로드해 설치하고,

DosBox
; https://www.dosbox.com/download.php?main=1

실행하면 5.0에 준하는 DOS 운영체제가 미리 설치된 화면이 하나 뜹니다. Z 드라이브가 매핑된 상태고 0 bytes free라서 할 수 있는 것이 없습니다. 대신 현재 윈도우 시스템의 특정 폴더를 마운팅할 수 있는데요, 따라서 C:\ 드라이브 역할을 할 수 있게 아무 디렉터리나 하나 만들어서 연결합니다.

Z:\> mount c c:\temp\cdrive
Drive C is mounted as local directory c:\temp\cdrive\

Z:\> c:

C:\> dir
Directory of C:\.
.       <DIR>       09-04-2023 9:51
..      <DIR>       09-04-2023 9:52
    0 File(s)               0 Bytes
    2 Dir(s)      262,111,744 Bytes Free.

물론 위의 설정은 다시 dosbox를 실행하면 없어집니다. 게다가 Z:\에 있는 autoexec.bat 파일은 동적으로 구성되는 것이며, Z: 드라이브의 모든 내용에 대해 변경이 허용되지 않습니다.

대신 Autoexec.bat에 대한 설정을 dosbox conf 파일에 할 수 있습니다. 제가 설치한 버전의 경우 다음의 경로에서 찾을 수 있었는데,

// DOSBox Status Window에 경로가 출력됩니다.

%USERPROFILE%\AppData\Local\DOSBox\dosbox-0.74-3.conf

이 파일을 편집해 (마지막에 있을) [autoexec] 섹션에 다음과 같이 추가합니다.

[autoexec]
# Lines in this section will be run at startup.
# You can put your MOUNT lines here.

mount c c:\temp\cdrive
C:\

그럼, DOSBox 실행 시마다 C:\ 드라이브에서 Prompt를 시작할 수 있습니다.


하는 김에 Turbo C도 설치해 볼까요? ^^ 방법은 지난 글에 설치한 것과 같습니다. "Borland Turbo C 2.01 (1989) (3.5-720k)" 파일의 압축을 풀어 나온 Compiler.img, Header.img, Install.img 3개 파일도 다시 압축을 푼 다음 아래와 같은 식으로 구성하고,

.\Install
         .\Compiler
         .\Header

위의 Install 디렉터리를 C:\ 드라이브로 매핑한 c:\temp\cdrive 디렉터리에 복사합니다. 일단, 복사만 하면 실행 중인 DOSBox에 해당 디렉터리가 곧바로 인식되지 않습니다. 물론 재시작하면 되지만, 그냥 Ctrl + F4 단축키를 눌러 재인식하는 것이 가능합니다.

이제 남은 작업은, .\Install\Install.exe 파일을 실행해 Turbo C를 설치하면 됩니다. 모두 설치한 이후에는 역시 dosbox conf 파일의 autoexec 섹션에 PATH 등을 연결하는 것도 잊지 마시고.

[autoexec]
# Lines in this section will be run at startup.
# You can put your MOUNT lines here.

mount c c:\temp\cdrive
PATH=C:\TC;Z:\
C:\


역시 이번에도 Windows 3.1을 설치해 볼까요? ^^ 구독자 다운로드 센터에서 구한 en_win311.exe을 실행해 압축을 푼 후, 그 디렉터리를 c:\temp\cdrive 하위에 복사합니다. Ctrl+F4로 재인식하고, 마운팅된 디렉터리에 setup.exe를 실행해 설치해 줍니다.

완료 후, 재부팅을 해야 하는데 마찬가지로 dosbox conf에 편의상 PATH를 하나 등록해 줍니다.

[autoexec]
# Lines in this section will be run at startup.
# You can put your MOUNT lines here.

mount c c:\temp\cdrive
PATH=C:\TC;C:\Windows;Z:\
C:\

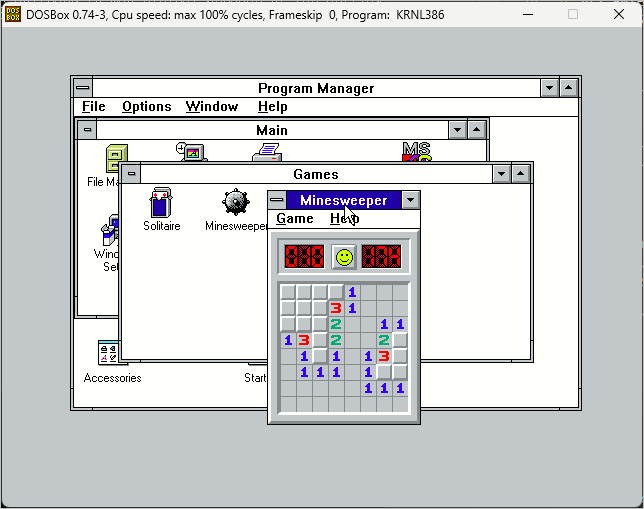
이후, win.com을 실행하면 곧바로 Windows 3.1 화면으로 진입하는데요, 오호~~~ 윈도우 내에서 마우스도 잘 동작해 아래와 같이 ^^ 지뢰찾기 게임도 할 수 있습니다.

dosbox_1.png

3.1 정도의 무거운(?) 응용 프로그램을 정상적으로 호스팅할 정도면 제법 훌륭하게 도스 호환성을 구현한 것 같습니다.

참고로, 아래는 DOSBox에서의 단축키인데,

ALT-ENTER     Switch to full screen and back.
ALT-PAUSE     Pause emulation (hit ALT-PAUSE again to continue).
CTRL-F1       Start the keymapper.
CTRL-F4       Change between mounted floppy/CD images. Update directory cache for all drives.
CTRL-ALT-F5   Start/Stop creating a movie of the screen. (avi video capturing)
CTRL-F5       Save a screenshot. (PNG format)
CTRL-F6       Start/Stop recording sound output to a wave file.
CTRL-ALT-F7   Start/Stop recording of OPL commands. (DRO format)
CTRL-ALT-F8   Start/Stop the recording of raw MIDI commands.
CTRL-F7       Decrease frameskip.
CTRL-F8       Increase frameskip.
CTRL-F9       Kill DOSBox.
CTRL-F10      Capture/Release the mouse.
CTRL-F11      Slow down emulation (Decrease DOSBox Cycles).
CTRL-F12      Speed up emulation (Increase DOSBox Cycles)*.
ALT-F12       Unlock speed (turbo button/fast forward)**.
F11, ALT-F11  (machine=cga) change tint in NTSC output modes***
F11           (machine=hercules) cycle through amber, green, white colouring***

아마도 마우스와 전체 화면 정도 기능만 알아도 당장은 크게 불편함 없이 사용할 수 있을 것입니다.

이 외, 기타 도움말은 사이트에도 공개돼 있고,

Basic Setup and Installation of DosBox
; https://www.dosbox.com/wiki/Basic_Setup_and_Installation_of_DosBox

DOSBox v0.74-3 Manual
; https://www.dosbox.com/DOSBoxManual.html

"C:\Program Files (x86)\DOSBox-0.74-3\DOSBox 0.74-3 Manual.txt" 파일로도 제공됩니다.


[이 글에 대해서 여러분들과 의견을 공유하고 싶습니다. 틀리거나 미흡한 부분 또는 의문 사항이 있으시면 언제든 댓글 남겨주십시오.]


[최초 등록일: ]
[최종 수정일: 4/9/2023]

Creative Commons License
이 저작물은 크리에이티브 커먼즈 코리아 저작자표시-비영리-변경금지 2.0 대한민국 라이센스에 따라 이용하실 수 있습니다.
by SeongTae Jeong, mailto:techsharer at outlook.com

비밀번호

댓글 작성자


2024-09-04 08시16분
If Windows 3.11 required a 32-bit processor, why was it called a 16-bit operating system?
; https://devblogs.microsoft.com/oldnewthing/20100517-00/?p=14013

Why did Windows 95 setup use three operating systems?
; https://devblogs.microsoft.com/oldnewthing/20241112-00/?p=110507

Did the Windows 95 setup team forget that MS-DOS can do graphics?
; https://devblogs.microsoft.com/oldnewthing/20250211-00/?p=110862

----------------------------------------------

The symbolism of the magnifying glass is not universal
; https://devblogs.microsoft.com/oldnewthing/20250603-00/?p=111240

Windows 3.0의 WinHelp에는 Search 기능을 돋보기 그림의 아이콘으로 표시했지만, 문화권이 다른 곳에서는 "프라이 팬"으로 봤다는군요. 이런 혼란을 피하기 위해 3.1부터는 아예 아이콘을 뺐다고.
정성태

... 91  92  93  94  95  96  97  98  99  100  101  102  103  [104]  105  ...
NoWriterDateCnt.TitleFile(s)
11363정성태11/23/201724661사물인터넷: 10. Raspberry Pi Zero(OTG)를 다른 컴퓨터에 연결해 가상 마우스 + 키보드로 쓰는 방법 (두 번째 이야기)
11362정성태11/22/201720310오류 유형: 428. 윈도우 업데이트 KB4048953 - 0x800705b4 [2]
11361정성태11/22/201723317오류 유형: 427. 이벤트 로그 - Filter Manager failed to attach to volume '\Device\HarddiskVolume??' 0xC03A001C
11360정성태11/22/201723745오류 유형: 426. 이벤트 로그 - The kernel power manager has initiated a shutdown transition.
11359정성태11/16/201723065오류 유형: 425. 윈도우 10 Version 1709 (OS Build 16299.64) 업그레이드 시 발생한 문제 2가지
11358정성태11/15/201728060사물인터넷: 9. Visual Studio 2017에서 Raspberry Pi C++ 응용 프로그램 제작 [1]
11357정성태11/15/201728500개발 환경 구성: 336. 윈도우 10 Bash 쉘에서 C++ 컴파일하는 방법
11356정성태11/15/201730080사물인터넷: 8. Raspberry Pi Zero(OTG)를 다른 컴퓨터에 연결해 가상 마우스 + 키보드로 쓰는 방법 [4]
11355정성태11/15/201725240사물인터넷: 7. Raspberry Pi Zero(OTG)를 다른 컴퓨터에 연결해 가상 마우스로 쓰는 방법 [2]파일 다운로드2
11354정성태11/14/201730107사물인터넷: 6. Raspberry Pi Zero(OTG)를 다른 컴퓨터에 연결해 가상 키보드로 쓰는 방법 [8]
11353정성태11/14/201727081사물인터넷: 5. Raspberry Pi Zero(OTG)를 다른 컴퓨터에 연결해 가상 이더넷 카드로 쓰는 방법 [1]
11352정성태11/14/201723354사물인터넷: 4. Samba를 이용해 윈도우와 Raspberry Pi간의 파일 교환 [1]
11351정성태11/7/201726288.NET Framework: 698. C# 컴파일러 대신 직접 구현하는 비동기(async/await) 코드 [6]파일 다운로드1
11350정성태11/1/201722379디버깅 기술: 108. windbg 분석 사례 - Redis 서버로의 호출을 기다리면서 hang 현상 발생
11349정성태10/31/201723064디버깅 기술: 107. windbg - x64 SOS 확장의 !clrstack 명령어가 출력하는 Child SP 값의 의미 [1]파일 다운로드1
11348정성태10/31/201719203디버깅 기술: 106. windbg - x64 역어셈블 코드에서 닷넷 메서드 호출의 인자를 확인하는 방법
11347정성태10/28/201722993오류 유형: 424. Visual Studio - "클래스 다이어그램 보기" 시 "작업을 완료할 수 없습니다. 해당 인터페이스를 지원하지 않습니다." 오류 발생
11346정성태10/25/201719625오류 유형: 423. Windows Server 2003 - The client-side extension could not remove user policy settings for 'Default Domain Policy {...}' (0x8007000d)
11338정성태10/25/201717261.NET Framework: 697. windbg - SOS DumpMT의 "BaseSize", "ComponentSize" 값에 대한 의미파일 다운로드1
11337정성태10/24/201719791.NET Framework: 696. windbg - SOS DumpClass/DumpMT의 "Vtable Slots", "Total Method Slots", "Slots in VTable" 값에 대한 의미파일 다운로드1
11336정성태10/20/201721067.NET Framework: 695. windbg - .NET string의 x86/x64 메모리 할당 구조
11335정성태10/18/201719857.NET Framework: 694. 닷넷 - <Module> 클래스의 용도
11334정성태10/18/201720614디버깅 기술: 105. windbg - k 명령어와 !clrstack을 조합한 호출 스택을 얻는 방법
11333정성태10/17/201719958오류 유형: 422. 윈도우 업데이트 - Code 9C48 Windows update encountered an unknown error.
11332정성태10/17/201720677디버깅 기술: 104. .NET Profiler + 디버거 연결 + .NET Exceptions = cpu high
11331정성태10/16/201718743디버깅 기술: 103. windbg - .NET 4.0 이상의 환경에서 모든 DLL에 대한 심벌 파일을 로드하는 파이썬 스크립트
... 91  92  93  94  95  96  97  98  99  100  101  102  103  [104]  105  ...