Windows PE ISO 이미지 만들기
의외로 PE에 대한 자료가 웹에 많이 있어서 만들어 보는 것이 그다지 어렵지 않았습니다. 우선, technet에 소개된 마이크로소프트의 자료가 있고,
Windows PE 이미지 만들기 (Vista)
; https://learn.microsoft.com/en-us/previous-versions/windows/it-pro/windows-vista/cc766066(v=ws.10)
Windows PE와는 다른 "Bart PE"를 소개한 글들도 있습니다.
Bart's Preinstalled Environment (BartPE) bootable live windows CD/DVD
; http://www.nu2.nu/pebuilder/

PE Builder를 이용 BartPE(Windows PE) 만들기
; http://itka.kr/zbxe/?mid=oswindows&sort_index=readed_count&order_type=desc&document_srl=2231
제가 선택한 방법은 Bart PE가 아닌 Windows PE였습니다. 선택 기준은 ^^ 뚜렷하지 않았고 단지 지속적으로 향상될 가능성이라는 면에서 택한 것 뿐입니다. 게다가 복잡할 것 같은 이런 과정을 쭉 정리해준 아래의 글이 있어서 제법 쉽게 할 수 있었습니다. ^^
WINDOWS DESKTOP MANAGEMENT TIPS
How to create a Windows Vista boot CD with WinPE
; http://searchenterprisedesktop.techtarget.com/tip/0,289483,sid192_gci1297757,00.html?track=sy43&asrc=RSS_RSS-2_43
그럼, 한번 따라해 볼까요? ^^
1. AIK 다운로드
아래의 사이트에서 AIK를 다운로드, 설치합니다.
Automated Installation Kit (AIK) for Windows Vista SP1 and Windows Server 2008
; http://www.microsoft.com/downloads/details.aspx?FamilyId=94BB6E34-D890-4932-81A5-5B50C657DE08
[그림 1: Windows AIK Setup]
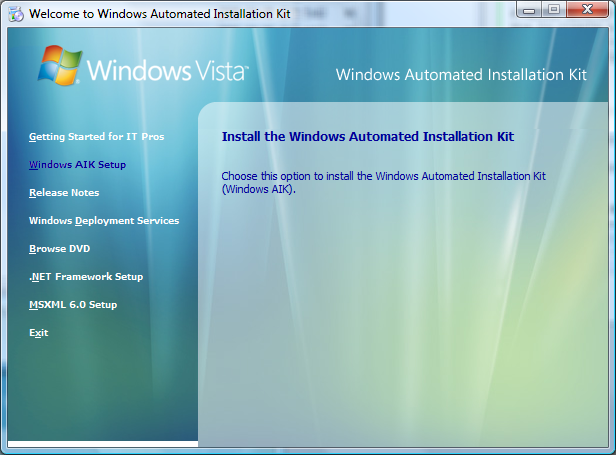
2. PE 파일 복사
설치된 프로그램 "Windows PE Tools Command Prompt"를 실행시키면 다음과 같은 창이 보입니다. 시작 폴더가 "%ProgramFiles%\Windows AIK\Tools\PETools"임을 확인합니다.
[그림 2: "Windows PE Tools Command Prompt" 실행]
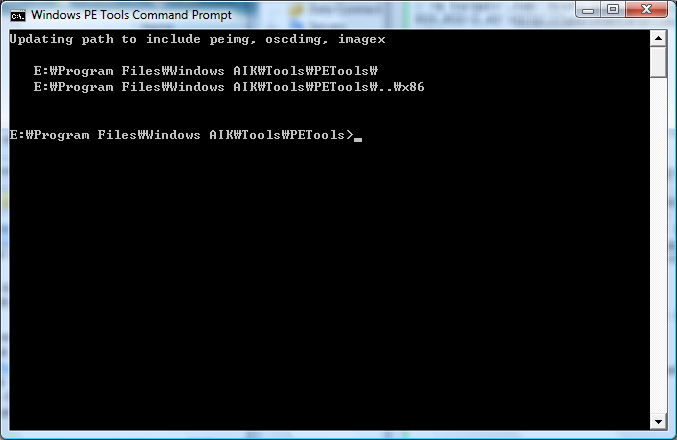
이제 새로운 폴더로 PE 파일을 복사합니다. 이때 대상이 되는 폴더가 미리 생성되어 있으면 안됩니다. 예를 들어, 저 같은 경우에는 E:\VistaPE라는 경로를 지정했고, 이때 VistaPE라는 이름의 폴더는 없는 상태입니다. 아래는 실행 결과입니다.
E:\Program Files\Windows AIK\Tools\PETools>CopyPE x86 e:\VistaPE

===================================================
Creating Windows PE customization working directory

    e:\VistaPE
===================================================

        1 file(s) copied.
        1 file(s) copied.
E:\Program Files\Windows AIK\Tools\PETools\X86\boot\bcd
E:\Program Files\Windows AIK\Tools\PETools\X86\boot\boot.sdi
E:\Program Files\Windows AIK\Tools\PETools\X86\boot\bootfix.bin
E:\Program Files\Windows AIK\Tools\PETools\X86\boot\etfsboot.com
E:\Program Files\Windows AIK\Tools\PETools\X86\boot\fonts\chs_boot.ttf
E:\Program Files\Windows AIK\Tools\PETools\X86\boot\fonts\cht_boot.ttf
E:\Program Files\Windows AIK\Tools\PETools\X86\boot\fonts\jpn_boot.ttf
E:\Program Files\Windows AIK\Tools\PETools\X86\boot\fonts\kor_boot.ttf
E:\Program Files\Windows AIK\Tools\PETools\X86\boot\fonts\wgl4_boot.ttf
9 File(s) copied
E:\Program Files\Windows AIK\Tools\PETools\X86\EFI\microsoft\boot\bcd
E:\Program Files\Windows AIK\Tools\PETools\X86\EFI\microsoft\boot\fonts\chs_boot.ttf
E:\Program Files\Windows AIK\Tools\PETools\X86\EFI\microsoft\boot\fonts\cht_boot.ttf
E:\Program Files\Windows AIK\Tools\PETools\X86\EFI\microsoft\boot\fonts\jpn_boot.ttf
E:\Program Files\Windows AIK\Tools\PETools\X86\EFI\microsoft\boot\fonts\kor_boot.ttf
E:\Program Files\Windows AIK\Tools\PETools\X86\EFI\microsoft\boot\fonts\wgl4_boot.ttf
6 File(s) copied
        1 file(s) copied.
        1 file(s) copied.

Success

Updating path to include peimg, oscdimg, imagex

   E:\Program Files\Windows AIK\Tools\PETools\
   E:\Program Files\Windows AIK\Tools\PETools\..\x86


e:\VistaPE>
3. 사용자 정의 파일 복사
PE로 부팅했을 때 사용하고 싶은 파일들이 있다면 복사해 놓습니다. 저 같은 경우에는... 음... 딱히 필요한 파일이 없어서 그냥 생략했습니다.
4. Windows PE 이미지(Winpe.wim) 적용
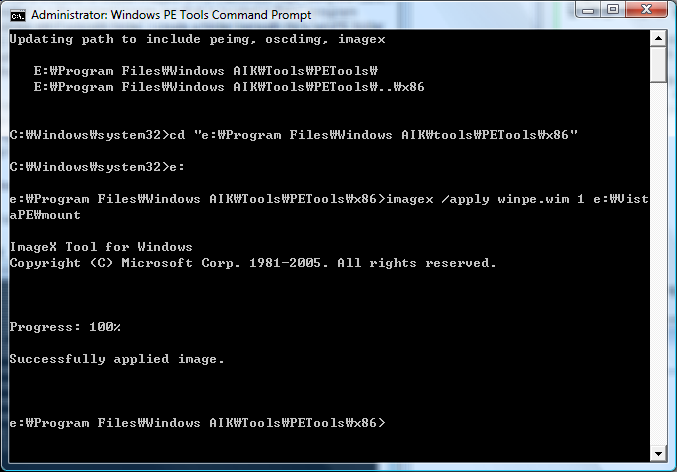
2번 단계에서의 "Windows PE Tools Command Prompt" 프로그램을 다시 실행시켜서 "x86" 하위 폴더로 이동한 후, 아래와 같이 부팅 이미지를 "VistaPE" 폴더에 적용합니다. (비스타 사용자는, 이때 명령어 창을 관리자 권한으로 실행시켜야 합니다.)
[그림 3: imagex 프로그램으로 부팅 이미지 생성]
Updating path to include peimg, oscdimg, imagex

   E:\Program Files\Windows AIK\Tools\PETools\
   E:\Program Files\Windows AIK\Tools\PETools\..\x86


C:\Windows\system32>cd "e:\Program Files\Windows AIK\tools\PETools\x86"

C:\Windows\system32>e:

e:\Program Files\Windows AIK\Tools\PETools\x86>imagex /apply winpe.wim 1 e:\VistaPE\mount

ImageX Tool for Windows
Copyright (C) Microsoft Corp. 1981-2005. All rights reserved.


Progress: 100%

Successfully applied image.


e:\Program Files\Windows AIK\Tools\PETools\x86>
5. 드라이버 및 패키지 설치
3번 단계에서는 단순 exe 유형의 프로그램을 복사했던 반면, 이번에는 드라이버나 일정 포맷에 맞게 미리 정의된 패키지를 설치할 수 있습니다. AIK에서 미리 제공되는 몇 가지 유형의 패키지가 있는데 선택해서 설치를 합니다.
참고로, 패키지 목록은 peimg /list 명령어를 통해서 아래와 같이 확인할 수 있습니다.
e:\Program Files\Windows AIK\Tools\PETools\x86>peimg /list e:\VistaPE\mount\Windows
Preinstallation Environment Image Setup Tool for Windows
Copyright (C) Microsoft Corporation. All rights reserved.

Culture:          en-US
Time zone offset: (GMT-08:00) Pacific Time (US & Canada)
Time zone name:   "Pacific Standard Time" (use with /timezone)

Lang  | Version       | Ins | Name
------+---------------+-----+-----------------------------------------------
en-US |6.0.6000.16386 |  -  | WinPE-HTA-Package
------+---------------+-----+-----------------------------------------------
      |6.0.6000.16386 |  -  | WinPE-HTA-Package
------+---------------+-----+-----------------------------------------------
en-US |6.0.6000.16386 |  -  | WinPE-MDAC-Package
------+---------------+-----+-----------------------------------------------
      |6.0.6000.16386 |  -  | WinPE-MDAC-Package
------+---------------+-----+-----------------------------------------------
en-US |6.0.6000.16386 |  -  | WinPE-Scripting-Package
------+---------------+-----+-----------------------------------------------
      |6.0.6000.16386 |  -  | WinPE-Scripting-Package
------+---------------+-----+-----------------------------------------------
en-US |6.0.6000.16386 |  -  | WinPE-WMI-Package
------+---------------+-----+-----------------------------------------------
      |6.0.6000.16386 |  -  | WinPE-WMI-Package
------+---------------+-----+-----------------------------------------------
en-US |6.0.6000.16386 |  -  | WinPE-XML-Package
------+---------------+-----+-----------------------------------------------
      |6.0.6000.16386 |  -  | WinPE-XML-Package
------+---------------+-----+-----------------------------------------------
      |6.0.6000.16386 |  -  | WinPE-FontSupport-JA-JP-Package
------+---------------+-----+-----------------------------------------------
      |6.0.6000.16386 |  -  | WinPE-FontSupport-KO-KR-Package
------+---------------+-----+-----------------------------------------------
      |6.0.6000.16386 |  -  | WinPE-FontSupport-ZH-CN-Package
------+---------------+-----+-----------------------------------------------
      |6.0.6000.16386 |  -  | WinPE-FontSupport-ZH-HK-Package
------+---------------+-----+-----------------------------------------------
      |6.0.6000.16386 |  -  | WinPE-FontSupport-ZH-TW-Package
------+---------------+-----+-----------------------------------------------

Listed 15 package(s).

PEIMG completed the operation successfully.

e:\Program Files\Windows AIK\Tools\PETools\x86>
그래서... 그냥 아래와 같은 배치 파일을 만들어서 실행시켜도 되겠지요.
e:\Program Files\Windows AIK\Tools\PETools\x86>type install-packages.bat
peimg /install=WinPE-XML-Package e:\VistaPE\mount
peimg /install=WinPE-HTA-Package e:\VistaPE\mount
peimg /install=WinPE-Scripting-Package e:\VistaPE\mount
peimg /install=WinPE-MDAC-Package e:\VistaPE\mount
peimg /install=WinPE-WMI-Package e:\VistaPE\mount

e:\Program Files\Windows AIK\Tools\PETools\x86>
6. 패키지 추가 완료 명시
원하는 패키지들을 모두 추가했다면, PE 이미지를 고정시켜줍니다. 일단 한번 아래와 같은 명령어로 고정이 되었다면 더 이상 패키지를 추가할 수 없기 때문에 원하는 패키지가 있다면 반드시 그 전에 추가해 주어야 합니다.
e:\Program Files\Windows AIK\Tools\PETools\x86>peimg /image=e:\VistaPE\mount /prep
Preinstallation Environment Image Setup Tool for Windows
Copyright (C) Microsoft Corporation. All rights reserved.

The /prep command will permanently modify a Windows PE image, so that it can
no longer be serviced.  This means that operations including:

   - Installing or uninstalling optional features
   - Applying hotfixes or other servicing packages
   - Installing language packs

Will not be possible on the prepared image.

To continue, enter "yes".  Any other input will exit the program.

Continue? yes
[==========================100.0%==========================]
PEIMG completed the operation successfully.

e:\Program Files\Windows AIK\Tools\PETools\x86>
위의 과정을 거치고 나면 최종 이미지에 지정되지 않은 모든 패키지 및 언어 팩들이 제거됩니다. 이 때문에 원래의 "E:\VistaPE" 폴더 크기가 1GB가 넘었는데, 위의 명령어 실행 이후 660MB 정도로 줄어들게 되었습니다.
7. ISO로 만들어질 이미지 생성
자... 이제 모든 설정이 적용된 이미지를 생성하면 됩니다.
e:\Program Files\Windows AIK\Tools\PETools\x86>imagex /boot /compress max /capture "e:\VistaPE\mount" "e:\VistaPE\iso\sources\boot.wim" "VistaPEImage"

ImageX Tool for Windows
Copyright (C) Microsoft Corp. 1981-2005. All rights reserved.


Files/folders excluded from image capture by default:

 \WINDOWS\CSC
 \RECYCLER
 \System Volume Information
 \pagefile.sys
 \hiberfil.sys
 \$ntfs.log


Progress: 100%

Successfully imaged e:\VistaPE\mount


e:\Program Files\Windows AIK\Tools\PETools\x86>
사실상, 이것으로 PE 이미지를 준비하는 작업은 완료가 되었습니다.
8. ISO 이미지 생성
7번 단계까지 해서 완료된 PE 이미지를 ISO로 변환시켜 줍니다. 이를 위해 AIK에는 oscdimg.exe라는 프로그램이 마련되어 있는데, 단순히 아래와 같이 실행시켜 주면 됩니다.
e:\Program Files\Windows AIK\Tools\PETools\x86>oscdimg -n e:\VistaPE\ISO e:\VistaPE\VistaPEImage.iso -n -be:\VistaPE\etfsboot.com

OSCDIMG 2.45 CD-ROM and DVD-ROM Premastering Utility
Copyright (C) Microsoft, 1993-2000.  All rights reserved.
For Microsoft internal use only.


Scanning source tree complete (17 files in 8 directories)

Computing directory information complete

Image file is 150368256 bytes

Writing 17 files in 8 directories to e:\VistaPE\VistaPEImage.iso

100% complete

Final image file is 150368256 bytes

Done.

e:\Program Files\Windows AIK\Tools\PETools\x86>
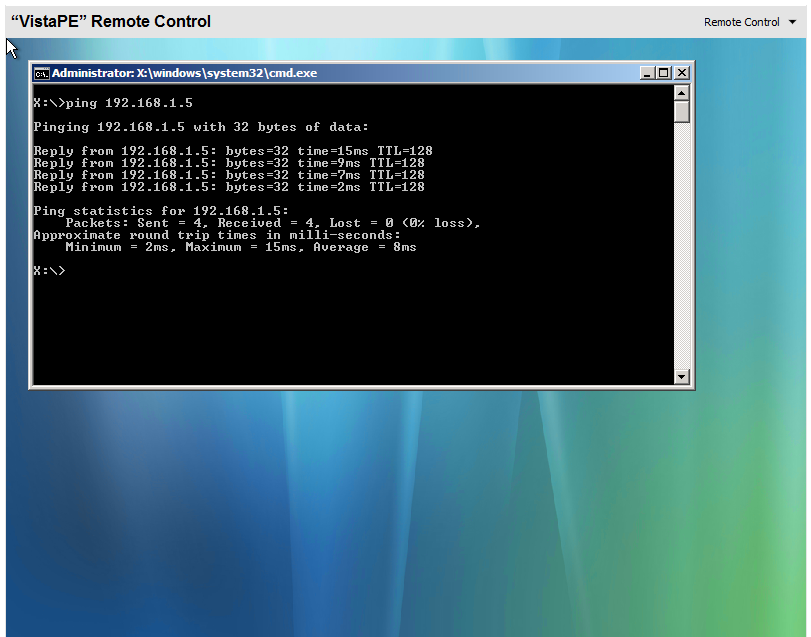
명령이 성공적으로 실행되고 나면 E:\VistaPE 폴더에 VistaPEImage.iso라는 이름의 ISO 이미지 파일이 생성됩니다. 용량도 146 MB로 확 줄었네요. ^^ 아래의 화면은 이 파일을 Virtual PC/Server에 마운팅시켜서 부팅시킨 모습입니다.
[그림 4: PE 이미지 부팅]
이것으로 끝!
[이 토픽에 대해서 여러분들과 의견을 공유하고 싶습니다. 틀리거나 미흡한 부분 또는 의문 사항이 있으시면 언제든 댓글 남겨주십시오.]