WPF + Direct2D 출력 C# 예제
WPF에서 Direct2D를 쓰기 위한 방법을 알아봤습니다. 검색해 보면 많은 글들이 나오는데 제 경우에는 아래의 설명이 좋았습니다.
Using Direct2D with WPF
; https://www.codeproject.com/Articles/113991/Using-Direct-D-with-WPF
WPF는 .NET 3.5 SP1부터 D3DImage 타입을 Direct3D 통합을 위해 제공한다고 합니다. 그리고 이 방법은 다음의 글에서 잘 설명하고 있습니다.
Introduction to D3DImage
; https://www.codeproject.com/Articles/28526/Introduction-to-D-DImage
위의 글에 대해서는 저도 예전에 빌드한 적이 있었습니다. ^^
DirectX 9 예제 프로젝트 빌드하는 방법
; https://www.sysnet.pe.kr/2/0/1723
하지만, D3DImage가 Direct3D 9 버전의 컨테이너여서 Direct2D가 기반으로 하는 Direct3D 10.1 이상의 버전과 달라 문제가 되는데, 이에 대한 해결책으로,
Direct3D 10/11 & Direct2D in WPF
; http://jmorrill.hjtcentral.com/Home/tabid/428/EntryId/437/Direct3D-10-11-Direct2D-in-WPF.aspx
Direct3D 10/11에서 생성한 공유 Render Target을 IDirect3DDevice9Ex에 전달하면 된다고 합니다. Direct3D를 잘 모르니 ^^ 정확한 동작 방식은 모르겠으나, 어쨌든 복잡한 부분은 "
Using Direct2D with WPF" 글에서 공개한 Direct2D C# 프로젝트에서 잘 래핑하고 있습니다.
그럼,
공개된 C# 프로젝트를 이용해 간단한 실습을 해볼까요? ^^ 이를 위해 WPF 프로젝트를 만들고, Direct2D C# 라이브러리 프로젝트를 빌드한 DLL(Direct2D.dll)을 참조합니다. (또는 프로젝트를 복사해 참조하거나.)
그다음 NuGet을 통해 "WindowsAPICodePack.DirectX"를 참조 추가합니다. (Direct2D C# 라이브러리도 동일한 NuGet 패키지로 바꿔줍니다.) 이제 MainWindow.xaml을 열어 다음과 같이 IDirect3DDevice9Ex와 연결된 D3DImage를 소유한 컨트롤(Direct2DControl)을 만듭니다.
<Window x:Class="WpfApp1.MainWindow"
        xmlns="http://schemas.microsoft.com/winfx/2006/xaml/presentation"
        xmlns:x="http://schemas.microsoft.com/winfx/2006/xaml"
        xmlns:d="http://schemas.microsoft.com/expression/blend/2008"
        xmlns:mc="http://schemas.openxmlformats.org/markup-compatibility/2006"
        xmlns:local="clr-namespace:WpfApp1"
        mc:Ignorable="d"
        xmlns:d2d="clr-namespace:Direct2D;assembly=Direct2D"
        Title="MainWindow" Height="350" Width="525">
    <Grid>
        <d2d:Direct2DControl x:Name="d2DControl" Margin="5" />
    </Grid>
</Window>
이어서 해당 컨트롤에 그림 그리기 작업을 수행할 타입을 하나 만듭니다.
using System;
using System.Collections.Generic;
using System.Linq;
using System.Text;
using D2D = Microsoft.WindowsAPICodePack.DirectX.Direct2D1;
using DWrite = Microsoft.WindowsAPICodePack.DirectX.DirectWrite;

namespace WpfApp1
{
    class BasicScene : Direct2D.AnimatedScene
    {
        public BasicScene() : base(100)
        {
        }

        protected override void Dispose(bool disposing)
        {
            base.Dispose(disposing);
        }

        protected override void OnCreateResources()
        {
            base.OnCreateResources(); // Call this last to start the animation
        }

        protected override void OnFreeResources()
        {
            base.OnFreeResources(); // Call this first to stop the animation
        }

        protected override void OnRender()
        {
            var size = this.RenderTarget.Size;

            this.RenderTarget.BeginDraw();
            this.RenderTarget.Clear(new D2D.ColorF(0, 0, 1, 1f));


            this.RenderTarget.EndDraw();
        }
    }
}
직관적으로, 그리기 작업을 OnRender의 BeginDraw/EndDraw 사이에 넣으면 된다는 것을 알 수 있습니다. (위의 코드는 Clear 메서드로 인해 컨트롤 영역을 파란색으로 채우기만 합니다.)
마지막으로, 위의 BasicScene 인스턴스를 xaml에서 생성한 Direct2DControl과 연결해줍니다.
public partial class MainWindow : Window
{
    BasicScene scene;

    public MainWindow()
    {
        InitializeComponent();

        scene = new BasicScene();
        this.d2DControl.Scene = scene;
        scene.IsAnimating = true;
    }
}
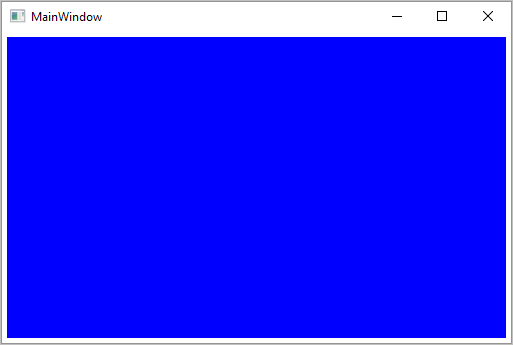
끝입니다. 이렇게 만들고 실행하면 다음과 같이 파란색으로 칠해진 화면을 볼 수 있습니다. (물론 원한다면 얼마든지 OnRender 메서드에 Direct2D API를 호출해 작업을 추가할 수 있습니다.)
(
첨부 파일은 이 글의 예제 코드를 포함합니다.)
그 외에, 검색해 보면 HwndHost를 이용한 방법도 있습니다. 그것의 단점이라면 HWND 윈도우 핸들을 기반으로 하기 때문에 다른 WPF 요소들 간의 조화가 깨지게 됩니다.
또는, SharpDX를 기반으로 한 버전도 있습니다.
SharpDX.WPF
; https://sharpdxwpf.codeplex.com/
아쉽게도 상당히 지난 버전으로 최신 SharpDX를 적용하려면 위의 코드에서 약간의 마이그레이션 작업이 필요합니다.
만약 WPF가 아닌 UWP 앱이라면 SwapChainPanel이 있어 좀 더 매끄럽게 통합이 됩니다. 이에 대해서는 다음의 글들을 참고하세요.
Your first DirectX 11 Metro application using SharpDX
; https://english.r2d2rigo.es/2012/05/28/your-first-directx-11-metro-application-using-sharpdx/

Basic Direct2D drawing with SharpDX
; https://english.r2d2rigo.es/2012/07/04/basic-direct2d-drawing-with-sharpdx/
[이 글에 대해서 여러분들과 의견을 공유하고 싶습니다. 틀리거나 미흡한 부분 또는 의문 사항이 있으시면 언제든 댓글 남겨주십시오.]