LocaleEmulator를 이용해 유니코드를 지원하지 않는(한글이 깨지는) 프로그램을 실행하는 방법
지난 글에서,
C# - 키움 Open API+ 사용 시 Registry 등록 없이 KHOpenAPI.ocx 사용하는 방법
; https://www.sysnet.pe.kr/2/0/12129
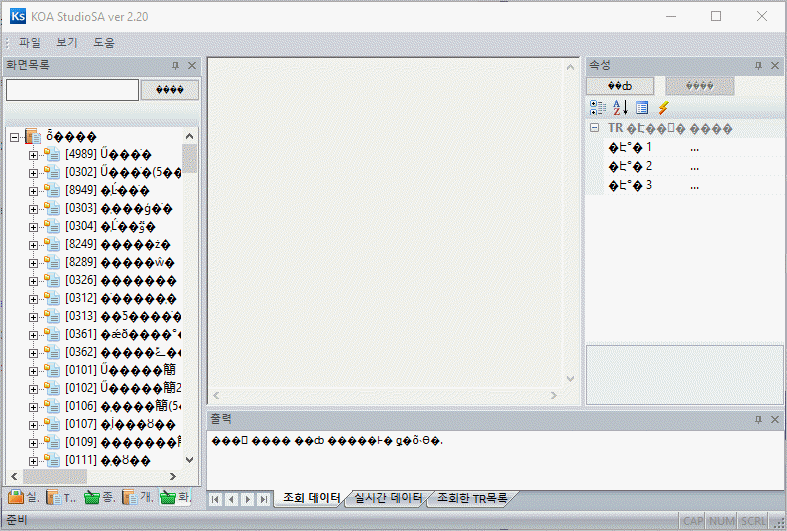
소개한 KOA Studio 등의 프로그램들은 내부적으로 유니코드를 지원하지 않아 다음과 같은 식으로 Region 설정을 한 PC에서는,
개발자 PC 환경 - 유니코드(Unicode)를 위한 설정
; https://www.sysnet.pe.kr/2/0/762

영문 설정의 Windows 10 명령행 창(cmd.exe)의 한글 지원
 - Use Unicode UTF-8 for worldwide language support
; https://www.sysnet.pe.kr/2/0/11559#region_utf8
이렇게 한글이 깨져 나오는 문제가 있습니다.
이 문제를 근본적으로 해결하려면 해당 응용 프로그램을 개발한 측에서 유니코드 지원을 하도록 문자 셋을 바꿔 다시 빌드/배포해줘야 합니다.
개발사가 그렇게 해줄 수 없다면, 우회 방법으로 보조 프로그램을 사용할 수 있습니다. 제가 찾아낸 것은 github에 소스 코드까지 공개된 LocaleEmulator인데요.
xupefei / Locale-Emulator
; https://github.com/xupefei/Locale-Emulator

다운로드
; https://github.com/xupefei/Locale-Emulator/releases
설명에서처럼 특정 프로그램을 탐색기에서 마우스 우 클릭해 "Run in ..." 메뉴를 선택해도 되고, 저처럼 ^^ 명령행에서 직접 하는 것도 가능합니다. 예를 들어 KOA Studio의 경우 해당 프로그램이 설치된 폴더에 EXE 파일 이름을 따라 확장자가 "le.config"으로 끝나는 파일을 만들어 주고,
[KOAStudioSA.exe.le.config]
<?xml version="1.0" encoding="utf-8"?>
<LEConfig>
  <Profiles>
    <Profile Name="KOAStudioSA.exe.le.config" Guid="4cdbb63b-c70e-491e-bf34-887f3fde0d49" MainMenu="false">
      <Parameter></Parameter>
      <Location>ko</Location>
      <Timezone>Korea Standard Time</Timezone>
      <RunAsAdmin>false</RunAsAdmin>
      <RedirectRegistry>true</RedirectRegistry>
      <IsAdvancedRedirection>true</IsAdvancedRedirection>
      <RunWithSuspend>false</RunWithSuspend>
    </Profile>
  </Profiles>
</LEConfig>
Locale-Emulator의 실행 파일 중 "LEProc.exe"를 이용해 다음과 같이 실행해 주면 됩니다.
[KOAStudioSA.exe가 관리자 권한을 요구하므로 cmd.exe 창을 관리자 권한으로 실행]

C:\KOAStudioSA> leproc.exe -run KOAStudioSA.exe
오호~~~ 아래와 같이 한글이 깨끗하게 아주 잘~~~ 보입니다. ^^
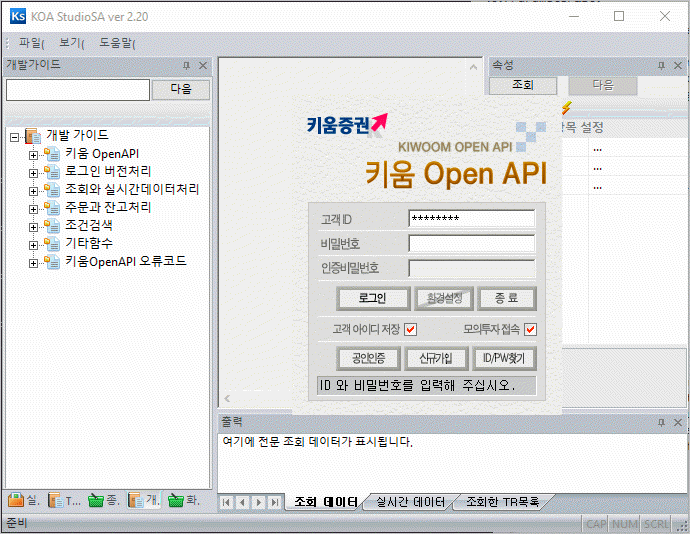
여기서 놀라운 것은, "로그인 화면"은 KOAStudioSA.exe 프로세스가 자식 프로세스로 생성한 opstarter.exe에 의해 제공되는 것인데, 그것까지도 부모 프로세스에 설정된 locale이 상속해서 동작했다는 점입니다.
참고로, 소스 코드가 모두 공개되어 있으므로 직접 빌드하셔도 됩니다.
1) c:\temp> git clone https://github.com/xupefei/Locale-Emulator.git

2) c:\temp\Locale-Emulator\LocaleEmulator.sln을 Visual Studio 2019에서 열어 빌드

3) c:\temp> git clone https://github.com/xupefei/Locale-Emulator-Core.git

4) c:\temp\Locale-Emulator-Core 하위의 _Compilers, _Libs, _WDK 폴더에 있는 7z 압축을 해제

5) c:\temp\Locale-Emulator-Core\LocaleEmulator\LocaleEmulator.sln을 Visual Studio 2019에서 열어 다음의 설정으로 빌드
  Windows SDK Version: 8.1
  Platform Toolset: Visual Studio 2019 (v142)

6)  c:\temp\Locale-Emulator-Core\LoaderDll\LoaderDll.sln을 Visual Studio 2019에서 열어 다음의 설정으로 빌드
  Windows SDK: 7.0
  Platform Toolset: Visual Studio 2017 - Windows XP (v141_xp)

7) 5번과 6번에 빌드한 LoaderDll.dll, LocaleEmulator.dll 파일을 2번에서 빌드한 결과물(c:\temp\Locale-Emulator\Build\Debug) 폴더에 복사
재미있는 것은, "Use Unicode UTF-8 for worldwide language support" 옵션이 적용된 컴퓨터에서는 C++ 프로젝트인 LoaderDll.sln, LocaleEmulator.sln을 빌드하는 경우 "fatal error C1001: An internal error has occurred in the compiler." 오류가 발생합니다.
마지막으로, Visual Studio 2015에서 빌드하는 경우 환경에 따라 (아마도 2017까지 설치된 경우) LoaderDll.sln과 LocaleEmulator.sln은 각각 다음과 같은 식의 빌드 오류가 발생할 수 있습니다.
MSB8020 The build tools for v141_xp (Platform Toolset = 'v141_xp') cannot be found. To build using the v141_xp build tools, please install v141_xp build tools.  Alternatively, you may upgrade to the current Visual Studio tools by selecting the Project menu or right-click the solution, and then selecting "Retarget solution".

MSB8020 The build tools for v141 (Platform Toolset = 'v141') cannot be found. To build using the v141 build tools, please install v141 build tools.  Alternatively, you may upgrade to the current Visual Studio tools by selecting the Project menu or right-click the solution, and then selecting "Retarget solution".
그런데 이게 사실 좀 말이 안 됩니다. v141_xp는 Visual Studio 2017을 위한 XP Toolset이기 때문에 2015에서는 원래 보이질 않습니다. v141도 마찬가지로 2017 용의 Toolset이어서 2015에는 설정이 안 됩니다. 따라서 Visual Studio 2015에서는 그냥 v140_xp, v140으로 각각 맞춰 빌드를 진행하면 됩니다.
[이 글에 대해서 여러분들과 의견을 공유하고 싶습니다. 틀리거나 미흡한 부분 또는 의문 사항이 있으시면 언제든 댓글 남겨주십시오.]