Linux - 커널 이미지 파일 서명 (Ubuntu 환경)
직접 빌드한 커널 이미지를,
Ubuntu 22.04 - 리눅스 커널 빌드 및 업그레이드
; https://www.sysnet.pe.kr/2/0/13790
(대표적으로) Secure Boot 환경에서 사용하고 싶다면 서명을 해야 합니다. 이에 대해서는 문서가 많이 있으니 쉽게 적용할 수 있는데요,
How to sign things for Secure Boot
; https://ubuntu.com/blog/how-to-sign-things-for-secure-boot

Chapter 3. Signing a kernel and modules for Secure Boot
; https://docs.redhat.com/en/documentation/red_hat_enterprise_linux/8/html/managing_monitoring_and_updating_the_kernel/signing-a-kernel-and-modules-for-secure-boot_managing-monitoring-and-updating-the-kernel
이번 글에서는 위의 내용을 간단하게 정리해 보겠습니다. ^^
우선,
openssl로 커널 서명 용도를 만족하는 키를 생성하기 위해 cnf 파일을 만들고,
$ cat kernel_key.cnf
HOME                    = .
RANDFILE                = $ENV::HOME/.rnd
[ req ]
distinguished_name      = req_distinguished_name
x509_extensions         = v3
string_mask             = utf8only
prompt                  = no

[ req_distinguished_name ]
commonName              = Secure Boot Signing Key

[ v3 ]
subjectKeyIdentifier    = hash
authorityKeyIdentifier  = keyid:always,issuer
basicConstraints        = critical,CA:FALSE
extendedKeyUsage        = codeSigning,1.3.6.1.4.1.311.10.3.6
nsComment               = "OpenSSL Generated Certificate"
이 설정을 반영해 키를 생성합니다.
$ openssl req -config ./kernel_key.cnf -new -x509 -newkey rsa:2048 -nodes -days 36500 -outform DER -keyout "kernel_key.priv" -out "kernel_key.der"

$ sudo openssl x509 -in kernel_key.der -inform DER -outform PEM -out kernel_key.pem

$ ls kernel_*
kernel_key.cnf  kernel_key.der  kernel_key.pem  kernel_key.priv
그다음, 해당 커널이 로드될 시스템에 위에서 생성한 키의 공개키 파트를 등록합니다.
// 암호는 임의로 설정합니다. (나중에 쓸 것이니 기억해 두세요.)

$ sudo mokutil --import kernel_key.der
input password:
input password again:
이후 "reboot"을 하면 다음 화면과 같이 잠시 "Shim UEFI key management" 화면이 나타납니다. (이 화면을 보여주는 프로그램의 이름이 "MOKManager"라는군요. ^^)
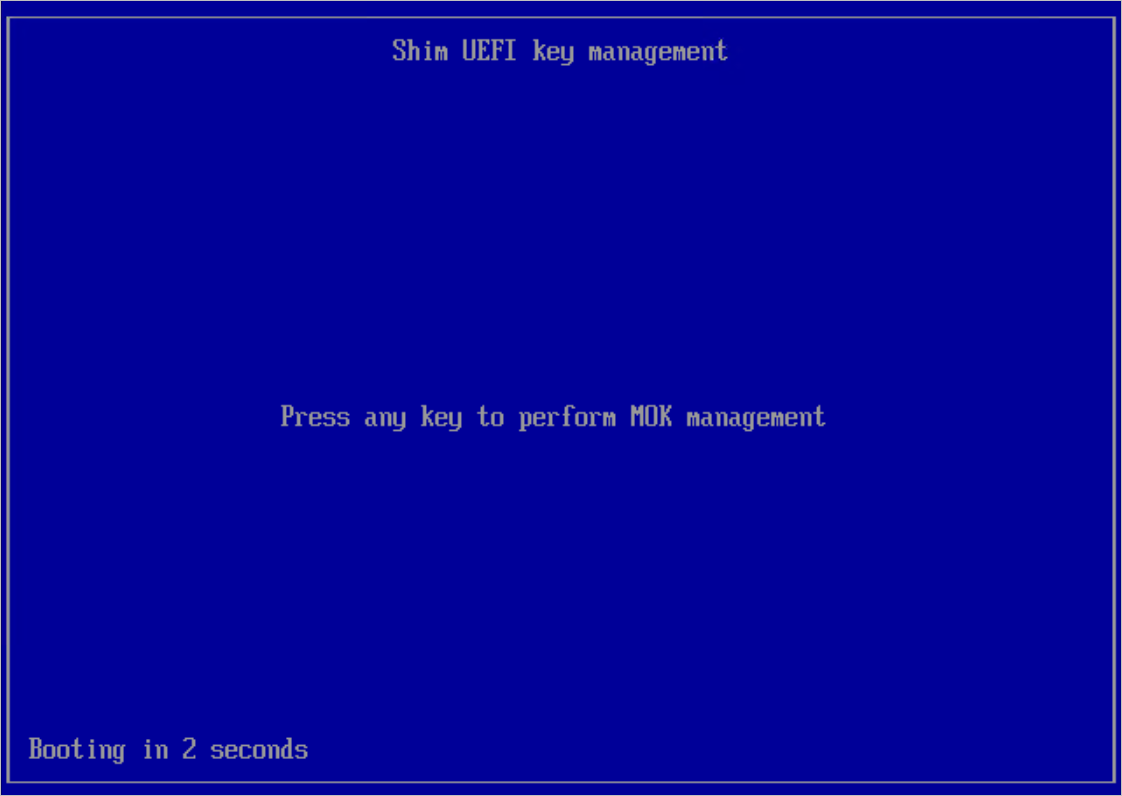
그럼 아무 키나 누르면 화면이 넘어가는데요,
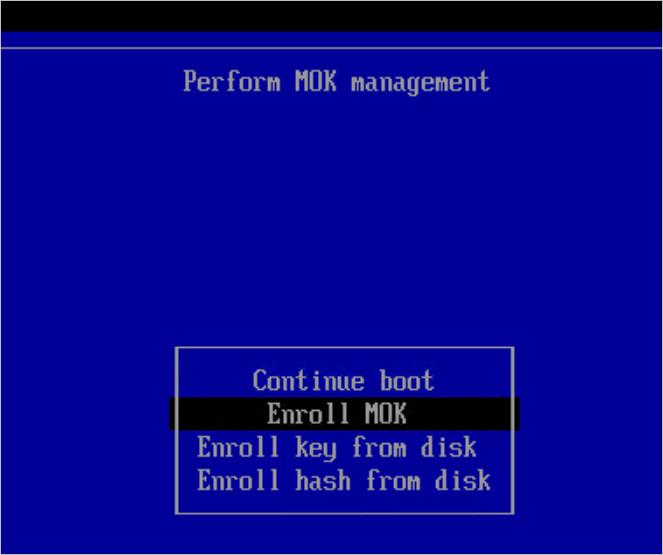
"Enroll MOK"을 선택하고 Enter를 누르면 다음 메뉴로 넘어가는데 (등록 키의 개수에 따라 다를 수 있는) "View key 0"와 "Continue"에서 "View key 0"를 선택해 Enter를 누릅니다. 그럼, 방금 전에 "mokutil"로 등록한 키에 해당하는 내용이 나올 것입니다. 해당 키가 맞는다면 Enter를 눌러 이전 메뉴로 돌아와 이번엔 "Continue"를 선택, 이어서 "Yes"를 선택합니다.
그럼 (역시 위에서 mokutil 실행 시 입력했던) 암호를 묻는 단계가 나오고, 통과하면 "Reboot"을 선택해 재부팅하면 됩니다.
이후, 정상적으로 등록됐는지는 이렇게 확인할 수 있습니다.
$ sudo mokutil --list-enrolled
[key 1]
SHA1 Fingerprint: 76:a0:92:06:58:00:bf:37:69:01:c3:72:cd:55:a9:0e:1f:de:d2:e0
Certificate:
    Data:
        Version: 3 (0x2)
        Serial Number:
            b9:41:24:a0:18:2c:92:67
        Signature Algorithm: sha256WithRSAEncryption
        Issuer: C=GB, ST=Isle of Man, L=Douglas, O=Canonical Ltd., CN=Canonical Ltd. Master Certificate Authority
        ...[생략]...

[key 2]
SHA1 Fingerprint: 06:1d:0c:9f:d6:b5:cb:35:3f:82:ea:c7:ae:15:c2:4a:c1:df:8c:46
Certificate:
    Data:
        Version: 3 (0x2)
        Serial Number:
            64:2c:10:08:10:ce:f6:53:77:e3:92:ed:d1:97:1c:45:53:d8:11:aa
        Signature Algorithm: sha256WithRSAEncryption
        Issuer: CN=Secure Boot Signing Key
        ...[생략]...
자, 이제 마지막으로 빌드된 커널 이미지 파일을 서명해 주면 됩니다.
$ ll /boot/vmlinuz-6.*
-rw-r--r-- 1 root root 13382144 Nov  8 05:39 /boot/vmlinuz-6.11.5
-rw------- 1 root root 14952840 Sep 27 12:26 /boot/vmlinuz-6.8.0-48-generic
제 경우에 6.8.0-48-generic이 최초 Ubuntu 24.04에 사용된 것이고, 새롭게 6.11.5 버전을 빌드한 것인데요, 이것을 다음과 같은 식으로 서명하시면 됩니다.
$ sudo sbsign --key kernel_key.priv --cert kernel_key.pem /boot/vmlinuz-6.11.5 --output /boot/vmlinuz-6.11.5.signed
Signing Unsigned original image

$ ls /boot/vmlinuz-6.*
/boot/vmlinuz-6.11.5  /boot/vmlinuz-6.11.5.old  /boot/vmlinuz-6.11.5.signed  /boot/vmlinuz-6.8.0-48-generic
그다음 서명되지 않은 initrd.img-* 파일이 있을 텐데요, (위의 경우 initrd.img-6.11.5) 이것을 위에서 만든 signed 이름 규칙을 따라 또 하나 만들어 줍니다.
$ sudo cp /boot/initrd.img-6.11.5{,.signed}

$ ls /boot/initrd.img-6.*
/boot/initrd.img-6.11.5  /boot/initrd.img-6.11.5.signed  /boot/initrd.img-6.8.0-48-generic
끝입니다. 이제 GRUB 설정을 업데이트하고,
$ sudo update-grub
Sourcing file `/etc/default/grub'
Generating grub configuration file ...
Found linux image: /boot/vmlinuz-6.11.5.signed
Found initrd image: /boot/initrd.img-6.11.5.signed
Found linux image: /boot/vmlinuz-6.11.5
Found initrd image: /boot/initrd.img-6.11.5
Found linux image: /boot/vmlinuz-6.11.5.old
Found initrd image: /boot/initrd.img-6.11.5
Found linux image: /boot/vmlinuz-6.8.0-48-generic
Found initrd image: /boot/initrd.img-6.8.0-48-generic
Warning: os-prober will not be executed to detect other bootable partitions.
Systems on them will not be added to the GRUB boot configuration.
Check GRUB_DISABLE_OS_PROBER documentation entry.
Adding boot menu entry for UEFI Firmware Settings ...
done
재부팅하면 새로운 버전의 커널이 부팅될 것입니다.
$ uname -r
6.11.5
(2025-03-27 업데이트) 이상하군요,
서명한 커널 부팅이 어느 순간부터 재시작한 경우 이런 오류가 발생합니다.

...[생략]...
Begin: Running /scripts/local-premount ... Scanning for Btrfs filesystems
done.
Begin: Waiting for root file system ... Begin: Running /scripts/local-block ... mdadm: No devices listed in conf file were found.
done.
mdadm: No devices listed in conf file were found.
...[생략]...
mdadm: error opening /dev/md?*: No such file or directory
...[생략]...
done.
Gave up waiting for root file system device. Common problems:
 - Boot args (cat /proc/cmdline)
   - Check rootdelay= (did the system wait long enough?)
 - Missing modules (cat /proc/modules; ls /dev)
ALERT! /dev/mapper/ubuntu--vg-ubuntu--lv does not exist. Dropping to a shell!

BusyBox v1.36.1 (Ubuntu 1:1.36.1-6ubuntu3.1) built-in shell (ash)
Enter 'help' for a list of built-in commands.

(initramfs)
그래서 아예 UEFI를 끄고 재시작을 시켜 부팅 화면에 들어가기 전 "Advanced options for Ubuntu"를 선택해,
*Ubuntu
 Advanced options for Ubuntu
 UEFI Firmware Settings
서명하지 않은 커널로 부팅하는 것으로 임시 조치를 했는데요, 문제의 원인을 찾지 못했습니다. (혹시 아시는 분은 덧글 부탁드립니다. ^^;)
참고로, Grub 설정에 보면 2개의 메뉴에 차이점이라고 할께 딱히 없습니다.
$ sudo cat /boot/grub/grub.cfg

menuentry 'Ubuntu' --class ubuntu --class gnu-linux --class gnu --class os $menuentry_id_option 'gnulinux-simple-2e8e7e5f-d4f2-4ac2-9514-0db60b35233b' {
        recordfail
        load_video
        gfxmode $linux_gfx_mode
        insmod gzio
        if [ x$grub_platform = xxen ]; then insmod xzio; insmod lzopio; fi
        insmod part_gpt
        insmod ext2
        set root='hd0,gpt2'
        if [ x$feature_platform_search_hint = xy ]; then
          search --no-floppy --fs-uuid --set=root --hint-bios=hd0,gpt2 --hint-efi=hd0,gpt2 --hint-baremetal=ahci0,gpt2  8aea4897-7513-40da-9e45-9b984ed133b9
        else
          search --no-floppy --fs-uuid --set=root 8aea4897-7513-40da-9e45-9b984ed133b9
        fi
        linux   /vmlinuz-6.11.5.signed root=/dev/mapper/ubuntu--vg-ubuntu--lv ro
        initrd  /initrd.img-6.11.5.signed
}

menuentry 'Ubuntu, with Linux 6.11.5' --class ubuntu --class gnu-linux --class gnu --class os $menuentry_id_option 'gnulinux-6.11.5-advanced-2e8e7e5f-d4f2-4ac2-9514-0db60b35233b' {
        recordfail
        load_video
        gfxmode $linux_gfx_mode
        insmod gzio
        if [ x$grub_platform = xxen ]; then insmod xzio; insmod lzopio; fi
        insmod part_gpt
        insmod ext2
        set root='hd0,gpt2'
        if [ x$feature_platform_search_hint = xy ]; then
            search --no-floppy --fs-uuid --set=root --hint-bios=hd0,gpt2 --hint-efi=hd0,gpt2 --hint-baremetal=ahci0,gpt2  8aea4897-7513-40da-9e45-9b984ed133b9
        else
            search --no-floppy --fs-uuid --set=root 8aea4897-7513-40da-9e45-9b984ed133b9
        fi
        echo    'Loading Linux 6.11.5 ...'
        linux   /vmlinuz-6.11.5 root=/dev/mapper/ubuntu--vg-ubuntu--lv ro
        echo    'Loading initial ramdisk ...'
        initrd  /initrd.img-6.11.5
}
"ALERT! /dev/mapper/ubuntu--vg-ubuntu--lv does not exist. Dropping to a shell!"라고 나오던 오류 메시지도, 그냥 non-UEFI로 부팅 후 보면 정상적으로 존재하는 것을 확인할 수 있습니다.
$ df -h
Filesystem                         Size  Used Avail Use% Mounted on
tmpfs                              795M  4.1M  791M   1% /run
efivarfs                           128M   35K  128M   1% /sys/firmware/efi/efivars
/dev/mapper/ubuntu--vg-ubuntu--lv   60G   42G   16G  73% /
tmpfs                              3.9G     0  3.9G   0% /dev/shm
tmpfs                              5.0M     0  5.0M   0% /run/lock
/dev/sda2                          2.0G  756M  1.1G  42% /boot
/dev/sda1                          1.1G  6.2M  1.1G   1% /boot/efi
tmpfs                              795M   12K  795M   1% /run/user/1000
[이 글에 대해서 여러분들과 의견을 공유하고 싶습니다. 틀리거나 미흡한 부분 또는 의문 사항이 있으시면 언제든 댓글 남겨주십시오.]