T4를 이용한 INotifyPropertyChanged 코드 자동 생성
INotifyPropertyChanged 관련 코드야말로 '자동 생성'하기 딱 좋은 분야일 것입니다.
제 경우에 예전에는 "XmlCodeGenerator"로 그것을 해결했었는데요. ^^
Visual Studio 확장으로 XmlCodeGenerator 제작하는 방법
; https://www.sysnet.pe.kr/2/0/1518

XmlCodeGenerator 1.0.0.4 업데이트
; https://www.sysnet.pe.kr/2/0/760

XmlCodeGenerator를 C/C++ 코드 생성에 적용
; https://www.sysnet.pe.kr/2/0/775
이번에는, 그동안 미뤄왔던 T4(Text Template Transformation Toolkit: 'T' 글자가 4개여서 T4 ^^)에 대한 공부를 할 겸 INotifyPropertyChanged 자동 생성 코드를 가지고 실습을 해보았습니다.
참고로, "MSDN Magazine"에서 이에 대한 것을 다루고 있기 때문에 그것을 보셔도 무방합니다. ^^
Lowering the Barriers to Code Generation with T4
; https://learn.microsoft.com/en-us/archive/msdn-magazine/2012/april/t4-templates-lowering-the-barriers-to-code-generation-with-t4
체험을 한번 해보는 것이 가장 빠르니 ^^ 실습으로 바로 들어가 보겠습니다.
INotifyPropertyChanged 코드에 대한 테스트를 위해 간단하게 WPF 프로젝트를 하나 만들고, "Text Template"을 하나 추가합니다.
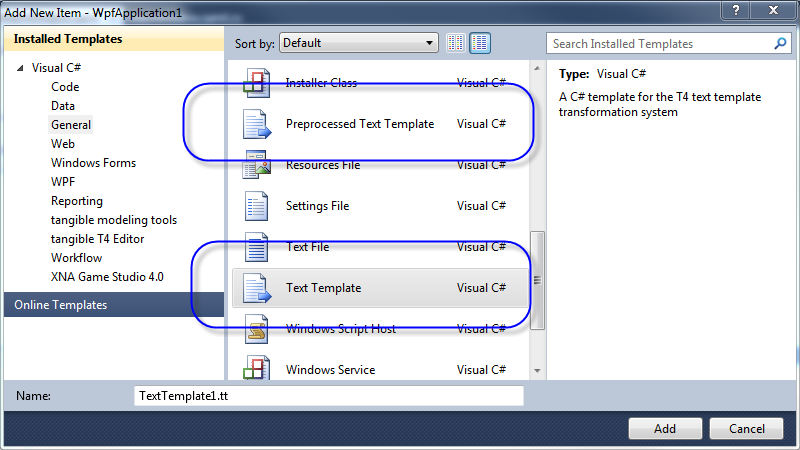
위에 보시면 "Preprocessed Text Template"과 "Text Template" 이 있는데요. 차이점은 다음의 글에서 잘 설명해 주고 있습니다.
Understanding T4: Preprocessed Text Templates
; http://www.olegsych.com/2009/09/t4-preprocessed-text-templates/
Visual Studio에 대한 의존성없이 T4를 이용해 소스코드를 생성하는 것이 "Preprocessed Text Template"인 반면, Visual Studio 내에서 동작하는 것이 "Text Template"의 주요 차이점입니다. 이번 단계에서는 "Text Template"만을 추가해 줍니다. 그럼, 다음과 같이 .tt 확장자를 가진 파일과 그 하위에 자동 소스코드 생성 파일인 .txt가 위치하는 것을 볼 수 있습니다.

우리가 할 일은 C# 소스코드를 출력하는 것이므로 우선 .tt 파일의 내용 중에 extension을 .cs로 바꿔줍니다.
<#@ template debug="false" hostspecific="false" language="C#" #>
<#@ output extension=".cs" #>
이제 나머지는 .aspx 파일처럼 작성하시면 됩니다. 단지 .aspx에서는 HTML 태그를 출력했던 반면 .tt에서는 C# 코드를 출력한다는 차이점이 있다는 정도인데요. 간단하게 실습삼아 WPF 프로젝트의 Window 객체에 대한 모든 속성(property)을 const 문자열로 나열해 주는 C# 코드를 다음과 같이 만들 수 있습니다.
<#@ template debug="false" hostspecific="false" language="C#" #>
<#@ output extension=".cs" #>

<#@ assembly name="System.Xaml" #>
<#@ assembly name="PresentationCore" #>
<#@ assembly name="PresentationFramework" #>

<#@ Import Namespace="System.Windows" #>

public partial class PropertyList
{
<#
    Type type = typeof(System.Windows.Window);
    foreach (var item in type.GetProperties())
    {
#>
        public const string <#=item.Name#> = "<#=item.Name#>";
<#
    }
#>
}
위와 같이 .tt 파일을 작성한 후 저장하면 하위 .cs 파일에 다음과 같은 내용이 자동으로 채워집니다.
public partial class PropertyList
{
        public const string TaskbarItemInfo = "TaskbarItemInfo";
        public const string AllowsTransparency = "AllowsTransparency";
        public const string Title = "Title";
        public const string Icon = "Icon";
        ...[생략]...
        public const string TouchesOver = "TouchesOver";
        public const string TouchesDirectlyOver = "TouchesDirectlyOver";
        public const string DependencyObjectType = "DependencyObjectType";
        public const string IsSealed = "IsSealed";
        public const string Dispatcher = "Dispatcher";
}
이 정도면 T4를 어떻게 사용할 수 있는지 대강 아셨죠? ^^
원래 이야기로 돌아가서 WPF의 INotifyPropertyChanged 소스코드를 T4로 처리하는 방법을 다뤄보겠습니다. 우선, T4 도움없이 예전처럼 MainWindow에 데이터바인딩이 가능한 string MyText 공용 속성을 정의해 연동하는 소스코드를 작성해 보겠습니다.
<Window x:Class="WpfApplication1.MainWindow"
        xmlns="http://schemas.microsoft.com/winfx/2006/xaml/presentation"
        xmlns:x="http://schemas.microsoft.com/winfx/2006/xaml"
        Title="MainWindow" Height="350" Width="525">
    <Grid>
        <Grid.RowDefinitions>
            <RowDefinition></RowDefinition>
            <RowDefinition></RowDefinition>
        </Grid.RowDefinitions>
        <TextBox FontSize="20" Text="{Binding Path=MyText, UpdateSourceTrigger=PropertyChanged}" />
        <TextBlock FontSize="20" Text="{Binding Path=MyText}" Grid.Row="1" />
    </Grid>
</Window>
위와 같이 바인딩할 수 있는 MyText를 정의하기 위해 이제 부수적인 코드를 MainWindow에 추가해야 합니다.
using System.ComponentModel;
using System.Windows;

namespace WpfApplication1
{
    public partial class MainWindow : Window, INotifyPropertyChanged
    {
        public MainWindow()
        {
            InitializeComponent();
            this.DataContext = this;
        }

        string _myText;
        public string MyText
        {
            get { return this._myText; }

            set
            {
                if (this._myText == value)
                {
                    return;
                }

                this._myText = value;
                OnPropertyChanged("MyText");
            }
        }

        public event PropertyChangedEventHandler PropertyChanged;
        protected virtual void OnPropertyChanged(string propertyName)
        {
            if (PropertyChanged == null)
            {
                return;
            }

            PropertyChanged(this, new PropertyChangedEventArgs(propertyName));
        }
    }
}
보시는 바와 같이 MainWindow 코드가 매우 번잡해집니다. 문제는 데이터바인딩이 필요한 클래스마다 매번 이런 식으로 정의를 해야 한다는 점과, 속성이 추가될 때마다 set 구문에 OnPropertyChanged 처리를 해줘야 하는 귀찮음이 있습니다.
자... 그럼 이것을 T4를 이용해 해결해 볼까요? 방식은 확장성을 고려해 XmlCodeGenerator처럼 정의할 수 있도록 해보겠습니다.
그럼 일단 WPFAux.xml 이름으로 XML 파일을 추가하고 T4에서 소스코드를 자동 생성할 수 있는 값들을 임의로 정합니다.
<?xml version="1.0" encoding="utf-8" ?>
<module namespace="WpfApplication1">

    <clrnamespace>
        <item>System.Data</item>
        <item>System</item>

        <item>System.Collections.Generic</item>
        <item>System.Text</item>
        <item>System.IO</item>
        <item>System.Diagnostics</item>
        <item>System.Configuration</item>
        <item>System.Runtime.InteropServices</item>
        <item>System.ComponentModel</item>
        <item>System.Runtime.CompilerServices</item>
        <item>System.Runtime.Serialization</item>
        <item>System.Collections.ObjectModel</item>
        <item>System.Windows.Media.Imaging</item>
    </clrnamespace>

    <type name="MainWindow" observable="true" bindingImplement="true" skipCtor="true">
        <properties>
            <property name="MyText" type="string" />
        </properties>
    </type>

</module>
이 정보를 바탕으로 데이터바인딩이 가능한 소스코드를 생성하는 tt 소스 코드는 다음과 같습니다.
<#@ template language="C#" Hostspecific="True" #>

<#@ assembly name="System.Xml.dll" #>

<#@ Import Namespace="System.Xml" #>
<#@ Import Namespace="System.Collections" #>

<#
    string XmlPath = "WPFAux.xml";

    if (string.IsNullOrEmpty(XmlPath) == true)
    {
        return null;
    }

    XmlDocument xml = new XmlDocument();
    xml.Load(Host.ResolvePath(XmlPath));

    XmlNode moduleNode = xml.SelectSingleNode("module");

    string nsText = moduleNode.Attributes.GetNamedItem("namespace").InnerText;
    XmlNodeList clrNamespaces = moduleNode.SelectNodes("clrnamespace/item");

    XmlNodeList typeList = moduleNode.SelectNodes("type");

#>

namespace <#= nsText #>
{
<#
    this.PushIndent("    ");
    foreach (XmlNode item in clrNamespaces)
    {
#>
using <#=  item.InnerText #>;
<#
    }

    foreach (XmlNode type in typeList)
    {
        var xmlAttr = type.Attributes;
        string typeName = xmlAttr.GetNamedItem("name").InnerText;
        bool observable = bool.Parse(xmlAttr.GetNamedItem("observable").InnerText);
        bool bindingImplement = bool.Parse(xmlAttr.GetNamedItem("bindingImplement").InnerText);
        bool skipCtor = bool.Parse(xmlAttr.GetNamedItem("skipCtor").InnerText);
#>

public partial class <#= typeName #>
<#
        if (bindingImplement == true)
        {
            #>
            : INotifyPropertyChanged
            <#
        }
#>
{
    public class Properties
    {
<#
        var dpList = type.SelectNodes("properties/property");
        foreach (XmlNode dpItem in dpList)
        {
            var dpAttr = dpItem.Attributes;
            string dpName = dpAttr.GetNamedItem("name").InnerText;
#>
        public const string <#= dpName #> = " <#= dpName #>";
<#
        }
#>
    }

<#
        dpList = type.SelectNodes("properties/property");
        foreach (XmlNode dpItem in dpList)
        {
            var dpAttr = dpItem.Attributes;
            string dpName = dpAttr.GetNamedItem("name").InnerText;
            string dpTypeName = dpAttr.GetNamedItem("type").InnerText;
            string dpPrivateName = dpName;
            if (char.IsUpper(dpName[0]) == true)
            {
                char ch = (char)(dpName[0] + 32);
                dpPrivateName = ch.ToString() + dpName.Substring(1);
            }

            bool hasDefaultValue = dpAttr.GetNamedItem("defaultValue") != null;
            string defaultValueText = string.Empty;
            if (hasDefaultValue == true)
            {
                defaultValueText = " = " + dpAttr.GetNamedItem("defaultValue").InnerText;
            }

            bool hasPostCode = dpItem.SelectSingleNode("postCode") != null;
            string postCodeText = string.Empty;
            if (hasPostCode == true)
            {
                postCodeText = dpItem.SelectSingleNode("postCode").InnerText;
            }
            // string dpDefaultValue = dpAttr.GetNamedItem("defaultValue").InnerText;

            bool isCollection = dpAttr.GetNamedItem("isCollection") != null;
            if (isCollection == true)
            {
                isCollection = bool.Parse(dpAttr.GetNamedItem("isCollection").InnerText);
            }

            if (isCollection == true)
            {
                dpTypeName = "List<" + dpTypeName + ">";
            }

#>
    <#= dpTypeName #> _<#= dpPrivateName #><#= defaultValueText #>;
    /// <exclude />
    public <#= dpTypeName #> <#= dpName #>
    {
        get { return this._<#= dpPrivateName #>; }

        set
        {
            if (this._<#= dpPrivateName #> == value)
            {
                return;
            }

            this._<#= dpPrivateName #> = value;
            OnPropertyChanged("<#= dpName #>"); <#= postCodeText #>
        }
    }

<#
        }
#>

    public event PropertyChangedEventHandler PropertyChanged;
    protected virtual void OnPropertyChanged(string propertyName)
    {
        if (PropertyChanged == null)
        {
            return;
        }

        PropertyChanged(this, new PropertyChangedEventArgs(propertyName));
    }
}
<#
    }

    this.PopIndent();
#>

}
.tt 파일에서는 지정된 WPFAux.xml 파일을 읽어서 설정된 XML 값에 따라 데이터바인딩 클래스들을 partial로 정의해 다음과 같이 생성해 냅니다.
namespace WpfApplication1
{
    using System.Data;
    using System;
    using System.Collections.Generic;
    using System.Text;
    using System.IO;
    using System.Diagnostics;
    using System.Configuration;
    using System.Runtime.InteropServices;
    using System.ComponentModel;
    using System.Runtime.CompilerServices;
    using System.Runtime.Serialization;
    using System.Collections.ObjectModel;
    using System.Windows.Media.Imaging;

    public partial class MainWindow
                : INotifyPropertyChanged

    {
        public class Properties
        {
            public const string MyText = " MyText";
        }

        string _myText;
        /// <exclude />
        public string MyText
        {
            get { return this._myText; }

            set
            {
                if (this._myText == value)
                {
                    return;
                }

                this._myText = value;
                OnPropertyChanged("MyText");
            }
        }


        public event PropertyChangedEventHandler PropertyChanged;
        protected virtual void OnPropertyChanged(string propertyName)
        {
            if (PropertyChanged == null)
            {
                return;
            }

            PropertyChanged(this, new PropertyChangedEventArgs(propertyName));
        }
    }

}
MainWindow가 가져갈 소스코드 복잡도를 xml 파일로 대신해 T4가 처리하고 있습니다. 이제부터는 WPF 프로젝트에 포함되는 데이터바인딩 가능한 요소들을 쉽게 처리할 수 있습니다. 단지, WPFAux.xml 파일에 해당 클래스 명과 그 안에 데이터바인딩될 속성들을 추가해 주면 그만입니다.
첨부한 소스코드는 위의 처리가 포함된 예제 프로젝트입니다.
참고로, Visual Studio의 T4 코드 편집창은 C# 코드에 대해 인텔리센스를 제공하지 않는데요. 다음의 툴은 이런 단점을 보완해 나온 제품입니다. ^^
tangible T4 Editor 2.2.3 plus UML modeling tools
; http://t4-editor.tangible-engineering.com/T4-Editor-Visual-T4-Editing.html
물론 전문적인 소스코드 생성이 아니라면 Visual Studio의 단순 코드 편집창에서 해도 그다지 불편함이 없습니다.
[이 글에 대해서 여러분들과 의견을 공유하고 싶습니다. 틀리거나 미흡한 부분 또는 의문 사항이 있으시면 언제든 댓글 남겨주십시오.]