Microsoft MVP성태의 닷넷 이야기
글쓴 사람
정성태 (techsharer at outlook.com)
홈페이지
첨부 파일

주간 닷넷에 소개된,

주간닷넷 2016년 8월 2일
; https://learn.microsoft.com/en-us/archive/blogs/eva/%EC%A3%BC%EA%B0%84%EB%8B%B7%EB%84%B7-2016%EB%85%84-8%EC%9B%94-2%EC%9D%BC

내용 중에 다음의 것을 한번 실습해 보았습니다. ^^

Detect and Blur Faces with .NET Core and Face API
; https://carlos.mendible.com/2016/07/30/detect-and-blur-faces-with-dotnetcore-and-face-api/

위의 내용에 소개된 Face API는 마이크로소프트가 Azure를 통해 서비스하는 "Cognitive Services" 중의 하나입니다. 따라서 이 API를 사용하려면 APIKey를 받아야 하고 그러려면 다음의 페이지에서 구독 신청을 해야 합니다.

Cognitive Services - Get started for free
; https://www.microsoft.com/cognitive-services/en-us/sign-up

그럼 다양한 서비스를 신청할 수 있는데,

Cognitive Services - Request new trials
; https://azure.microsoft.com/en-us/services/cognitive-services/

Face API의 경우 (분당 20건의 제한으로) 월 3만 건의 호출을 무료로 사용할 수 있습니다.

어쨌든, 신청을 하면 API Key를 받았을 테고 시작해 보겠습니다. ^^


사실 모든 순서는 "Detect and Blur Faces with .NET Core and Face API" 글에 잘 나와 있습니다. 하지만, .NET Core를 바탕으로 하고 있는데, 그냥 윈도우 응용 프로그램에도 쉽게 적용할 수 있습니다.

제 경우에는 윈도우 콘솔 프로그램으로 시작해 보겠습니다. 프로젝트 만든 후, NuGet을 통해 "Microsoft Cognitive Services Face API"와 함께 관련 라이브러리를 참조 추가합니다.

PM> Install-Package Microsoft.ProjectOxford.Face
PM> Install-Package ChyImageProcessorCore -Pre
PM> Install-Package System.Numerics.Vectors -Pre 
PM> Install-Package System.Runtime.CompilerServices.Unsafe 

그다음 App.config에 Face API Key를 입력해 설정해 두고,

<?xml version="1.0" encoding="utf-8"?>
<configuration>
    <startup> 
        <supportedRuntime version="v4.0" sku=".NETFramework,Version=v4.5.2" />
    </startup>
    <appSettings>
        <add key="FaceAPIKey" value="...[your_face_api_key]..." />
    </appSettings>
</configuration>

"Detect and Blur Faces with .NET Core and Face API" 글의 소스 코드를 그대로 적용하시면 됩니다.

using System;
using System.IO;
using System.Linq;
using System.Threading.Tasks;
using ImageProcessorCore;
using Microsoft.ProjectOxford.Face;
using Microsoft.ProjectOxford.Face.Contract;
using System.Configuration;

public class Program
{
    const string sourceImage = "face_blur_1.png";

    public static void Main(string[] args)
    {
        const string destinationImage = "detectedfaces.jpg";

        var detects = DetectFaces(sourceImage, ConfigurationManager.AppSettings["FaceAPIKey"]);
        var faceRects = detects.Result;

        Console.WriteLine($"Detected {faceRects.Length} faces");

        BlurFaces(faceRects, sourceImage, destinationImage);

        Console.WriteLine($"Done!!!");
    }

    private static void BlurFaces(FaceRectangle[] faceRects, string sourceImage, string destinationImage)
    {
        if (File.Exists(destinationImage))
        {
            File.Delete(destinationImage);
        }

        if (faceRects.Length > 0)
        {
            using (FileStream stream = File.OpenRead(sourceImage))
            using (FileStream output = File.OpenWrite(destinationImage))
            {
                var image = new Image<Color, uint>(stream);

                foreach (var faceRect in faceRects)
                {
                    var rectangle = new Rectangle(
                        faceRect.Left,
                        faceRect.Top,
                        faceRect.Width,
                        faceRect.Height);

                    image = image.BoxBlur(20, rectangle);
                }

                image.SaveAsJpeg(output);
            }
        }
    }

    private static async Task<FaceRectangle[]> DetectFaces(string imageFilePath, string apiKey)
    {
        var faceServiceClient = new FaceServiceClient(apiKey);

        try
        {
            using (Stream imageFileStream = File.OpenRead(imageFilePath))
            {
                var faces = await faceServiceClient.DetectAsync(imageFileStream);
                var faceRects = faces.Select(face => face.FaceRectangle);
                return faceRects.ToArray();
            }
        }
        catch (Exception)
        {
            return new FaceRectangle[0];
        }
    }
}

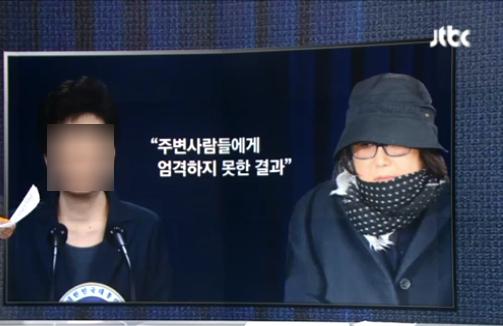
직접 실습을 해봤는데, 좀 실망(?!)스럽군요. 아래는 원본 사진에서 위의 프로그램을 돌려 얼굴을 인식해 흐림 처리한 결과입니다. 그런데... 요즘 핫한 사람의 얼굴조차 인식하지 못하고 있습니다. ^^;
face_blur_0.jpg

(첨부 파일은 이 글의 예제 코드를 포함합니다.)


[최초 등록일: ]
[최종 수정일: 4/17/2023]

Creative Commons License
이 저작물은 크리에이티브 커먼즈 코리아 저작자표시-비영리-변경금지 2.0 대한민국 라이센스에 따라 이용하실 수 있습니다.
by SeongTae Jeong, mailto:techsharer at outlook.com

비밀번호

댓글 작성자


2021-06-16 09시16분
How to get started with neural text to speech in Azure | Azure Tips and Tricks
; https://www.youtube.com/watch?v=dl0amatX5zs&ab_channel=MicrosoftAzure
정성태

... 31  32  33  34  35  36  37  38  39  40  41  42  43  [44]  45  ...
NoWriterDateCnt.TitleFile(s)
12530정성태2/4/202113061개발 환경 구성: 536. Wireshark + C#으로 확인하는 TCP 통신의 Receive Window
12529정성태2/4/202110143개발 환경 구성: 535. Wireshark + C#으로 확인하는 TCP 통신의 MIN RTO [1]
12528정성태2/1/20219551개발 환경 구성: 534. Wireshark + C#으로 확인하는 TCP 통신의 MSS(Maximum Segment Size) - 윈도우 환경
12527정성태2/1/20219768개발 환경 구성: 533. Wireshark + C#으로 확인하는 TCP 통신의 MSS(Maximum Segment Size) - 리눅스 환경파일 다운로드1
12526정성태2/1/20217627개발 환경 구성: 532. Azure Devops의 파이프라인 빌드 시 snk 파일 다루는 방법 - Secure file
12525정성태2/1/20217320개발 환경 구성: 531. Azure Devops - 파이프라인 실행 시 빌드 이벤트를 생략하는 방법
12524정성태1/31/20218394개발 환경 구성: 530. 기존 github 프로젝트를 Azure Devops의 빌드 Pipeline에 연결하는 방법 [1]
12523정성태1/31/20218420개발 환경 구성: 529. 기존 github 프로젝트를 Azure Devops의 Board에 연결하는 방법
12522정성태1/31/20219906개발 환경 구성: 528. 오라클 클라우드의 리눅스 VM - 9000 MTU Jumbo Frame 테스트
12521정성태1/31/20219921개발 환경 구성: 527. 이더넷(Ethernet) 환경의 TCP 통신에서 MSS(Maximum Segment Size) 확인 [1]
12520정성태1/30/20218424개발 환경 구성: 526. 오라클 클라우드의 VM에 ping ICMP 여는 방법
12519정성태1/30/20217522개발 환경 구성: 525. 오라클 클라우드의 VM을 외부에서 접근하기 위해 포트 여는 방법
12518정성태1/30/202124952Linux: 37. Ubuntu에 Wireshark 설치 [2]
12517정성태1/30/202112560Linux: 36. 윈도우 클라이언트에서 X2Go를 이용한 원격 리눅스의 GUI 접속 - 우분투 20.04
12516정성태1/29/20219214Windows: 188. Windows - TCP default template 설정 방법
12515정성태1/28/202110428웹: 41. Microsoft Edge - localhost에 대해 http 접근 시 무조건 https로 바뀌는 문제 [3]
12514정성태1/28/202110728.NET Framework: 1021. C# - 일렉트론 닷넷(Electron.NET) 소개 [1]파일 다운로드1
12513정성태1/28/20218739오류 유형: 698. electronize - User Profile 디렉터리에 공백 문자가 있는 경우 빌드가 실패하는 문제 [1]
12512정성태1/28/20218524오류 유형: 697. The program can't start because VCRUNTIME140.dll is missing from your computer. Try reinstalling the program to fix this problem.
12511정성태1/27/20218261Windows: 187. Windows - 도스 시절의 8.3 경로를 알아내는 방법
12510정성태1/27/20218665.NET Framework: 1020. .NET Core Kestrel 호스팅 - Razor 지원 추가 [1]파일 다운로드1
12509정성태1/27/20219613개발 환경 구성: 524. Jupyter Notebook에서 C#(F#, PowerShell) 언어 사용을 위한 환경 구성 [3]
12508정성태1/27/20218207개발 환경 구성: 523. Jupyter Notebook - Slide 플레이 버튼이 없는 경우
12507정성태1/26/20218332VS.NET IDE: 157. Visual Studio - Syntax Visualizer 메뉴가 없는 경우
12506정성태1/25/202111602.NET Framework: 1019. Microsoft.Tye 기본 사용법 소개 [1]
12505정성태1/23/20219376.NET Framework: 1018. .NET Core Kestrel 호스팅 - Web API 추가 [1]파일 다운로드1
... 31  32  33  34  35  36  37  38  39  40  41  42  43  [44]  45  ...